API v2 is the second generation of the Conquest API, built for Mobile Conquest. At this stage, it does not include support for the Conquest Work Planner, so if you’re using that, do not uninstall the API vs 1.
Here are the steps to install the Conquest API V2 for access over the Internet:
1. Bring your Conquest database up to date:
•API v2 version 2.0.7+ and Mobile App version 19.7+, the Conquest Database Version must be 3.4 or later. See IT Requirements for details on the requirements for Conquest III version 3.0400 and later
•Having upgraded the database, use the Management Console on the relevant Conquest III Instance, to:
•Edit the Database Connection for the upgraded database and Register it, if this has not already been done
•Perform Refresh System Objects. See Mandatory Database Functions for details
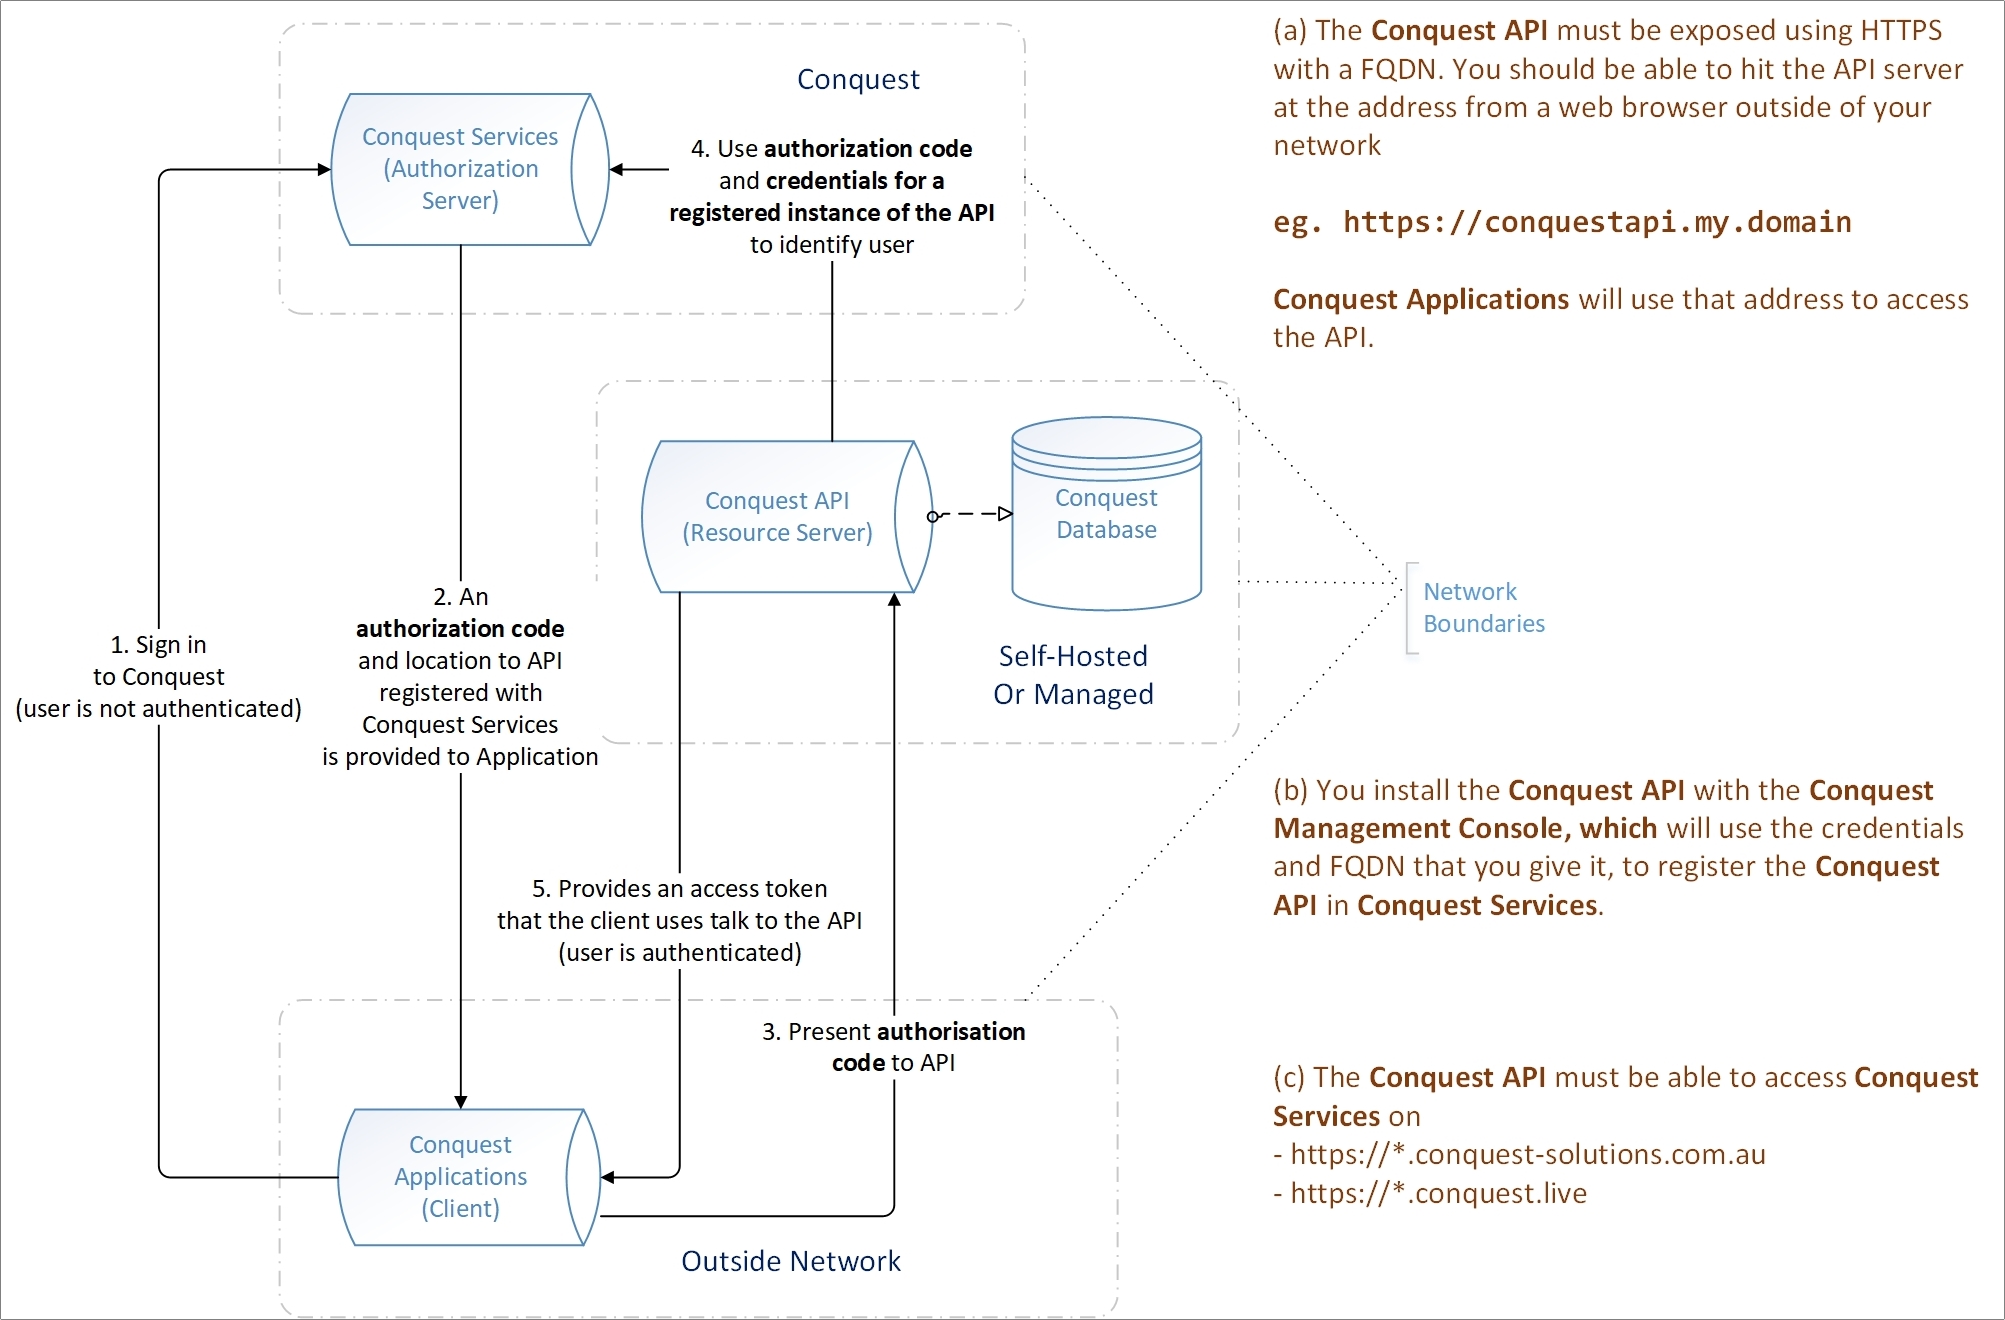
2. Acquire an encryption certificate for the Public Web Address of the API v2 e.g. https://cqapitest.myorg.mystate.gov.au:443, so the Domain Name in the certificate must be either a wildcard address e.g. *.myorg.mystate.gov.au, or must be an exact address e.g. cqapitest.myorg.mystate.gov.au
3. Set up a DNS “A” record on your Public DNS Server, which conforms to the Public Web Address (see step 2), and points to your organisation’s Public IP Address. See API v2 DNS for more details.
Note: Using a local DNS name as well as, or instead of, the public DNS name, is not supported.
4. Create a Service Account, which must have the ‘Log on as a Service Right’, to run the API v2. See API v2 Service Account for details.
The Service Account must also be a member of the Active Directory Permission Group used for Administrator Users of Conquest III, to give it the necessary level of access to the Conquest Database.
Note: The Service Account is the only account that needs access to the API V2, Application Folder. Therefore, it is good security practice, after the installation, to remove all other permissions that might have been inherited by the Application Folder.
5. On your web server that will host the Conquest API v2, open a port to receive Web Requests forwarded from the Perimeter Firewall Rule. From the Management Console, Conquest API v2 installation form, you will see that this port is called Local Port and has a default of 8443, which you can substitute your own port number for. You need to open an Inbound Firewall Rule for that port, before the Conquest API v2 can run. See API v2 Security for details.
6. Ping the DNS name from step 3, to make sure it resolves. If not, investigate and correct it.
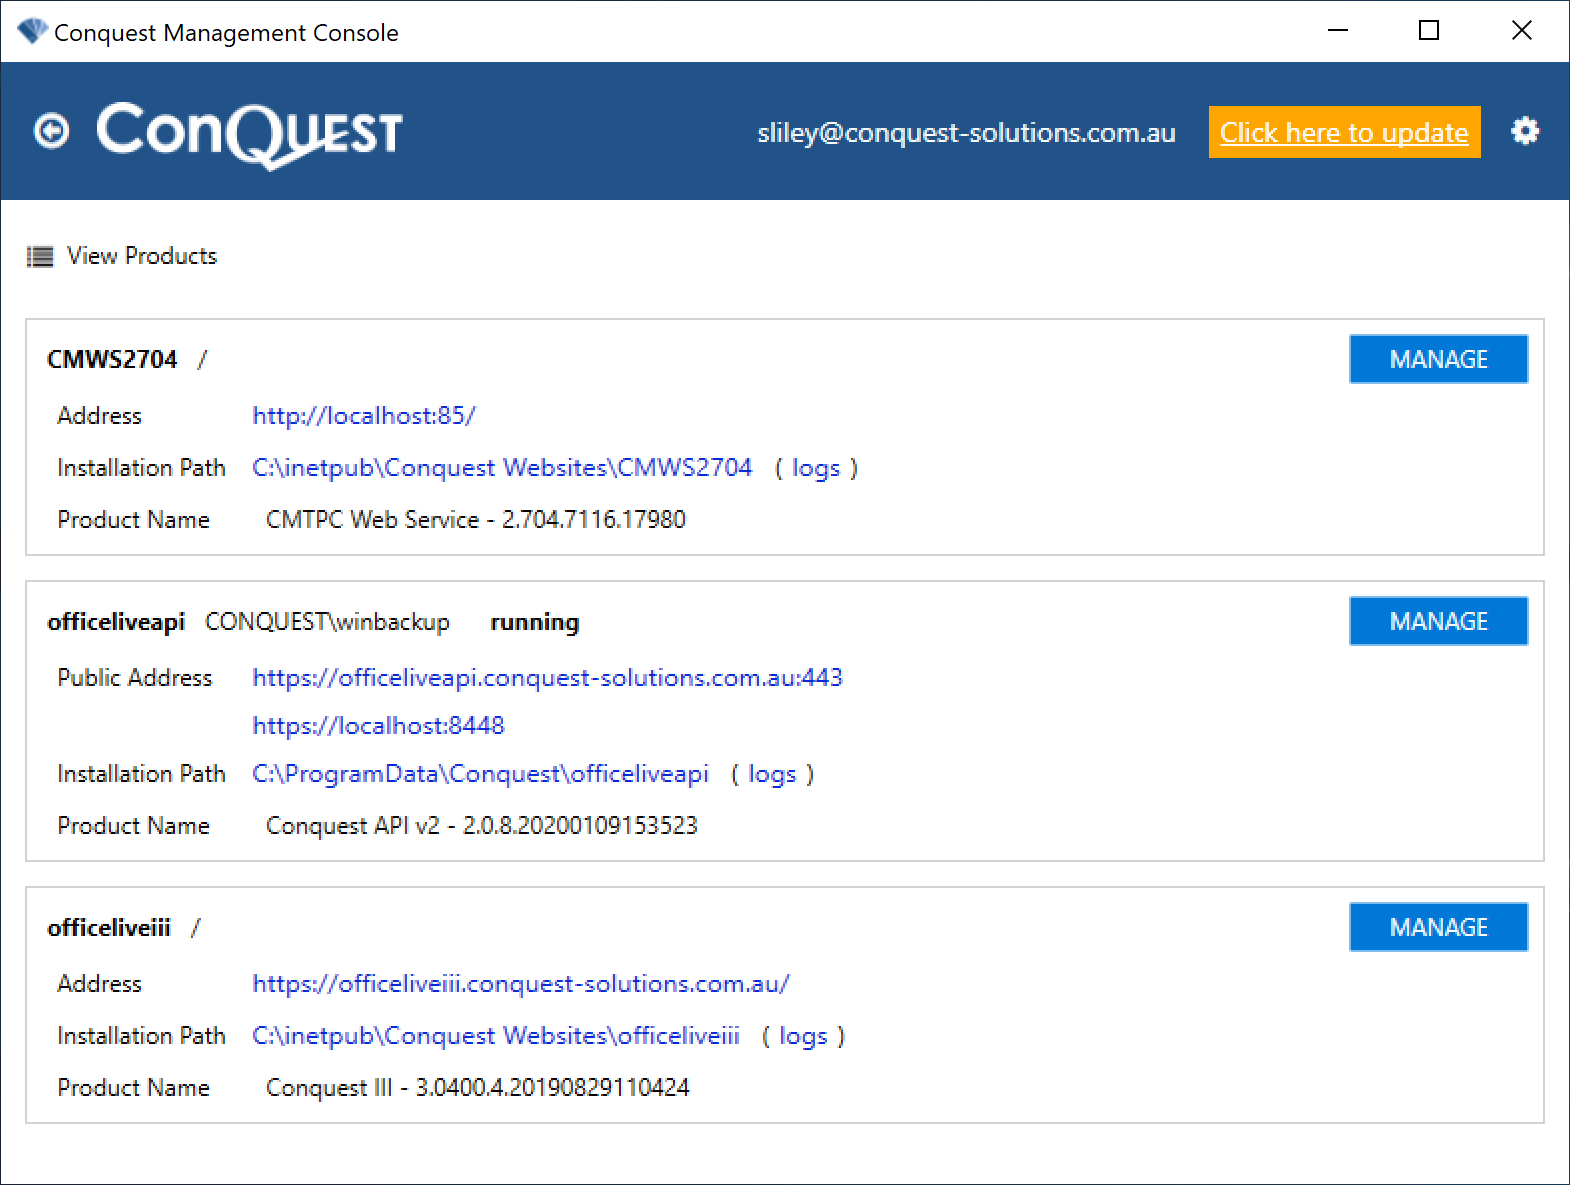
Start The Conquest Management Console. If you see Click here to update in the App Header, please do so. If you haven’t yet installed the Management Console, you can do it now with this Hyperlink.
If this is your first use of it, the Management Console will look empty:
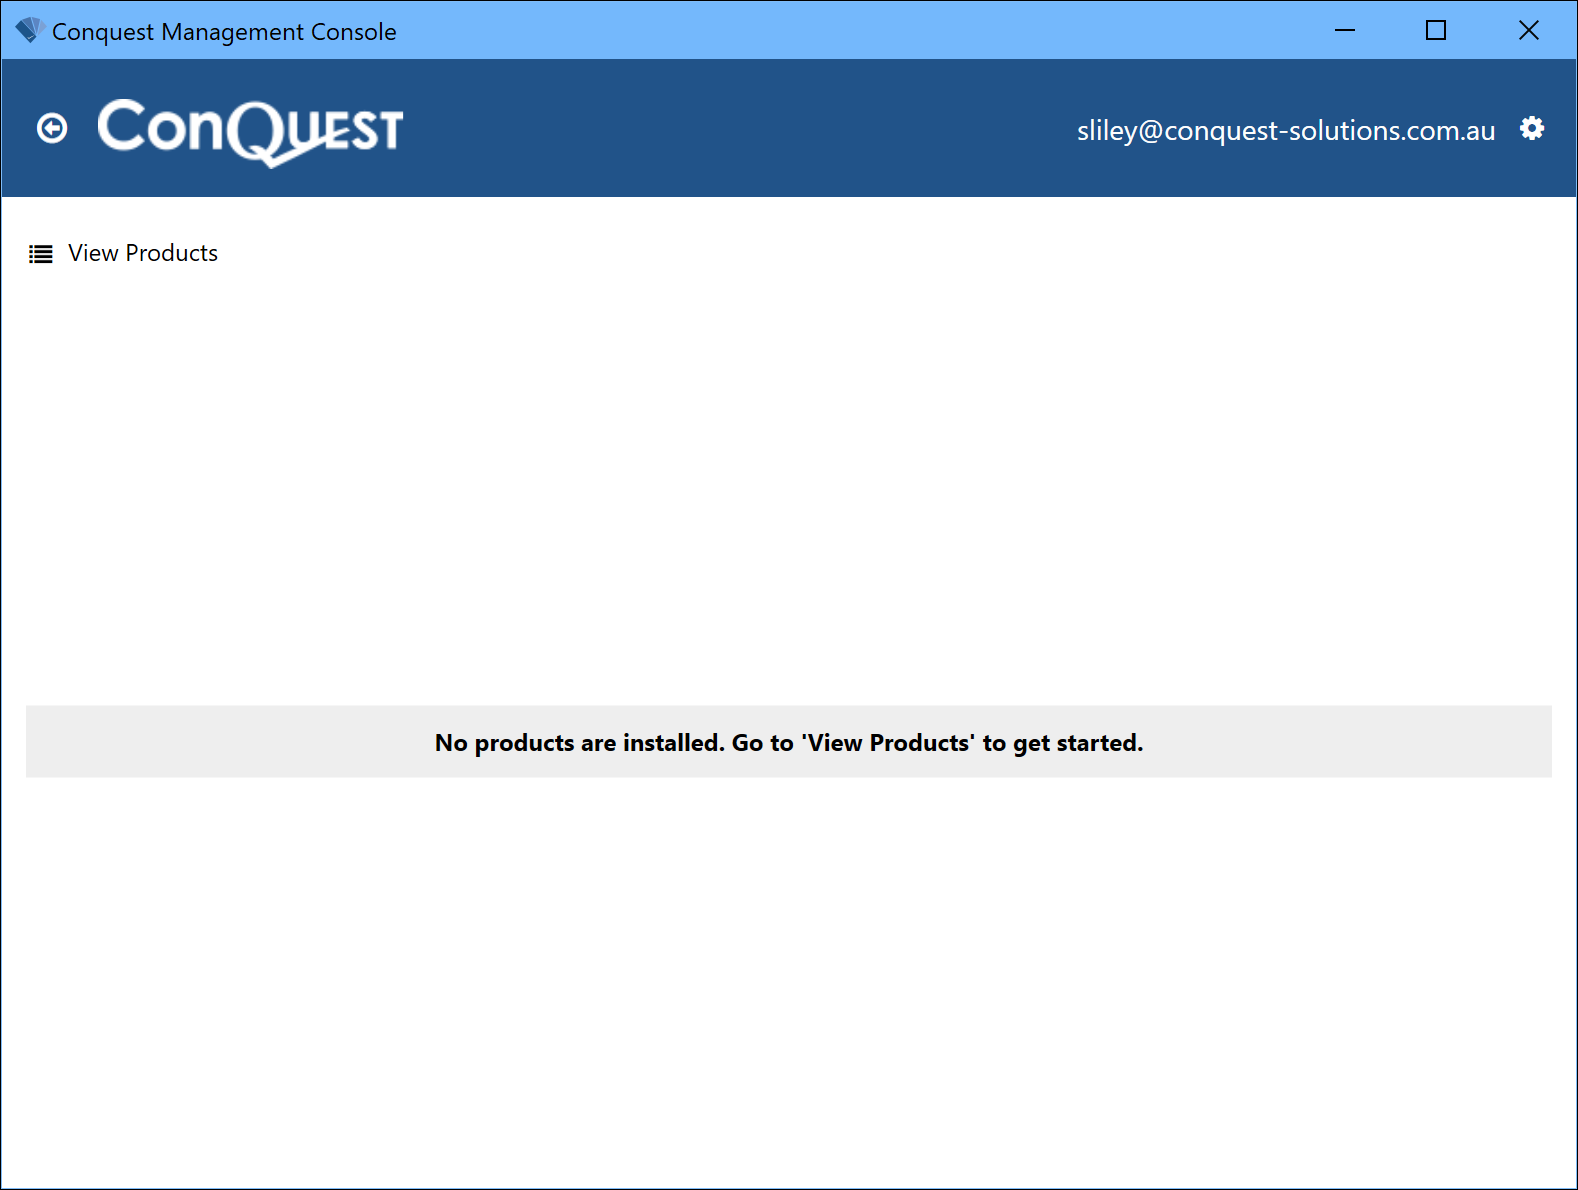
•Click the View Products button
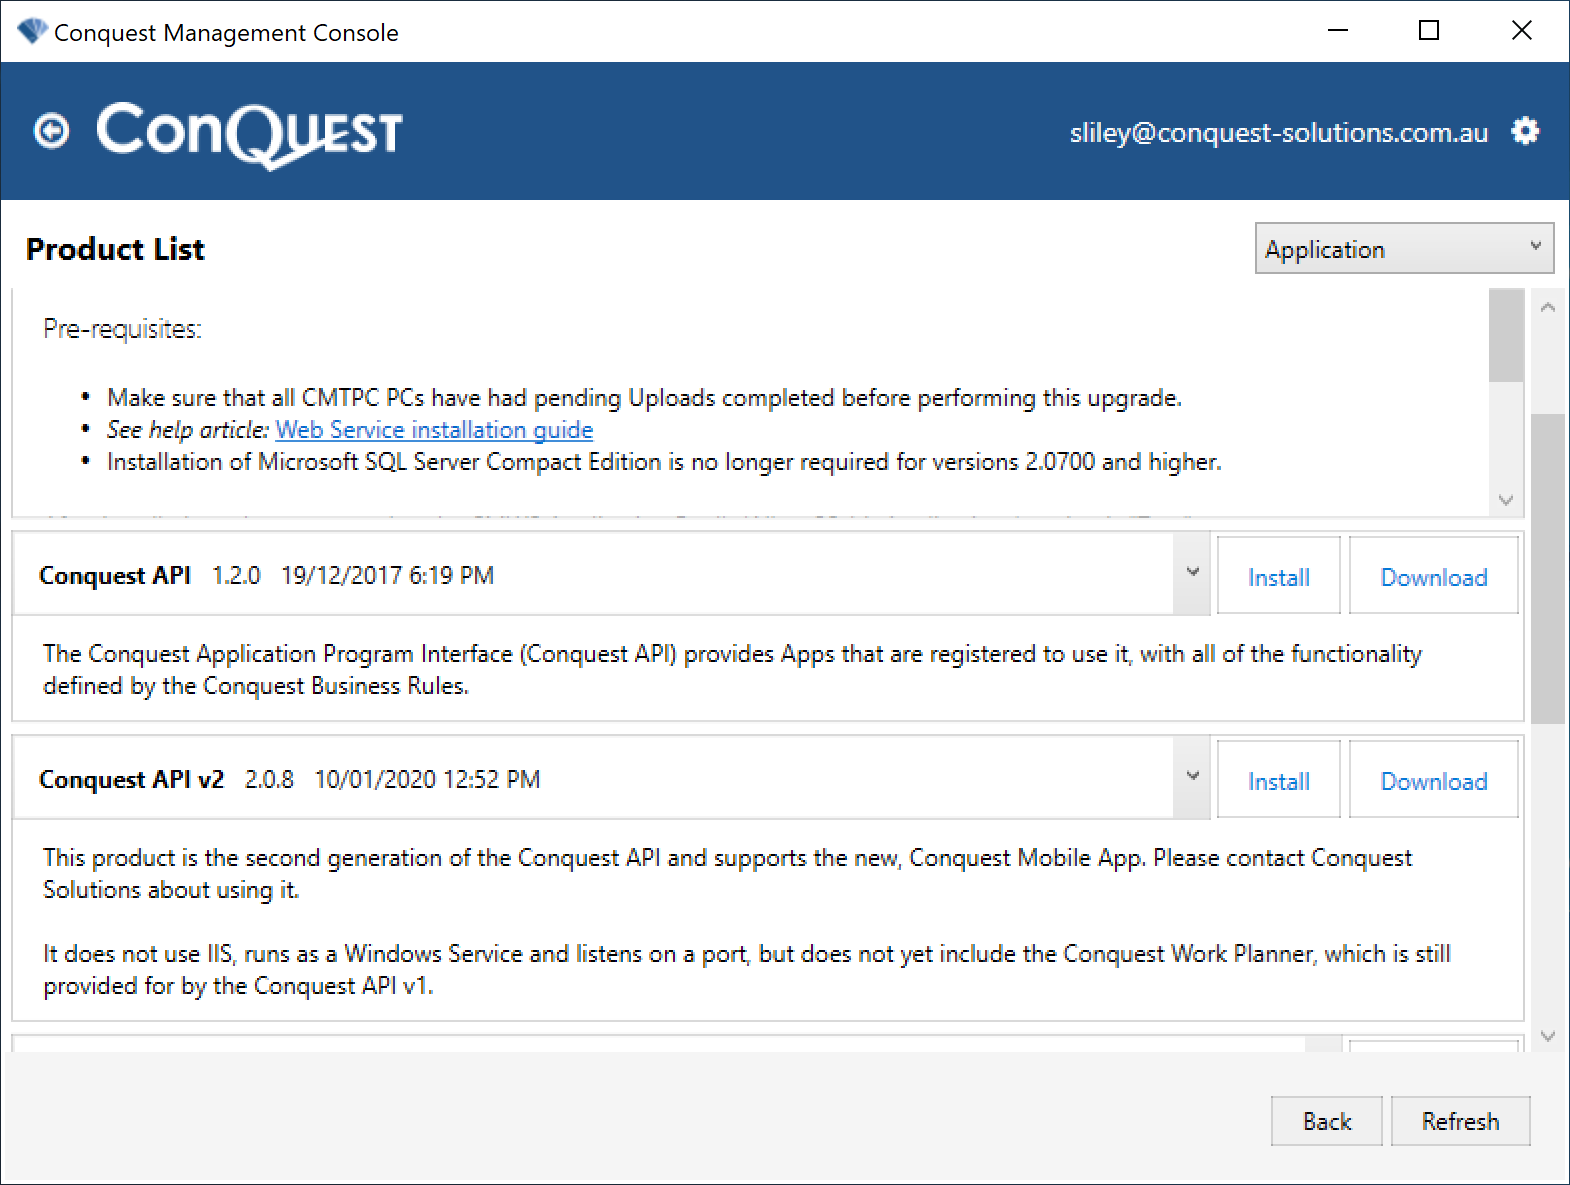
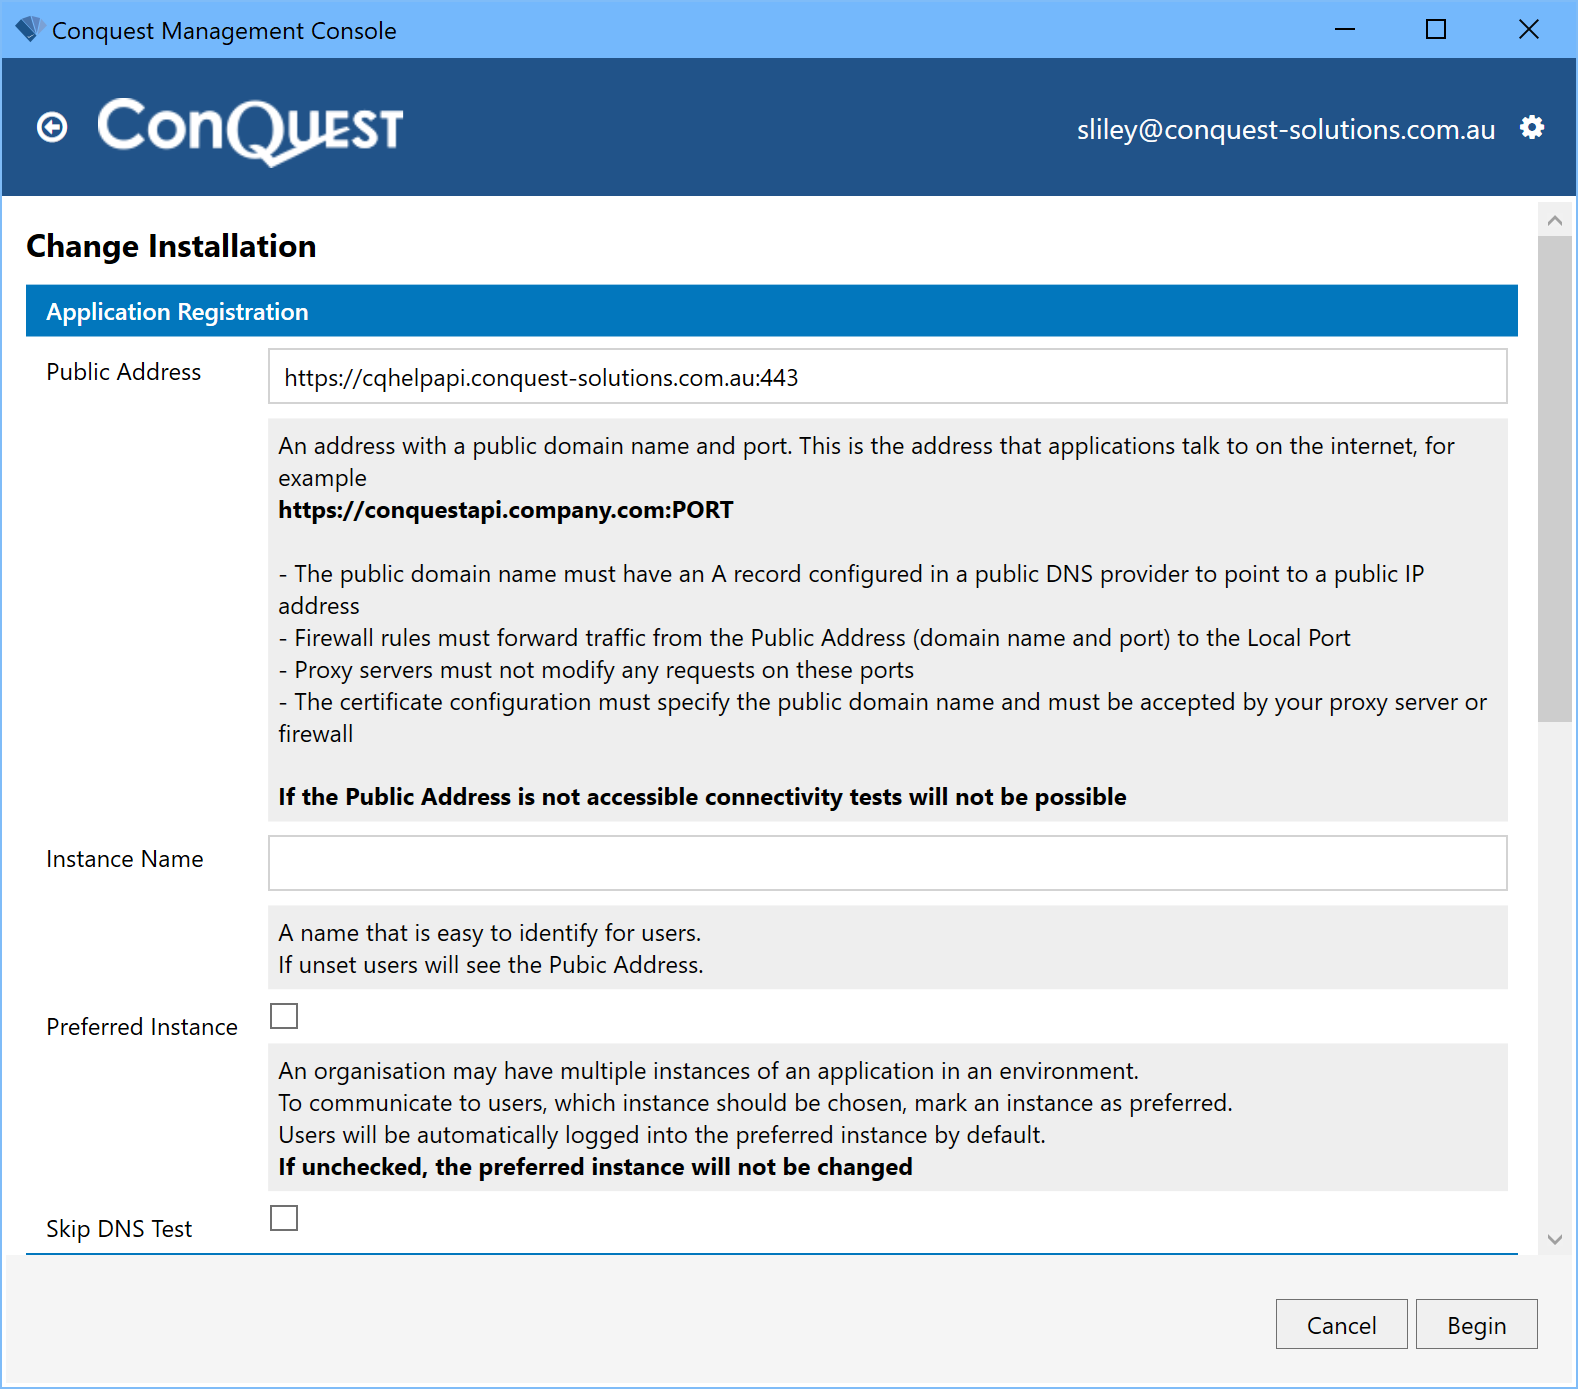
•Click the Install button for Conquest API v2 and create the API as follows:
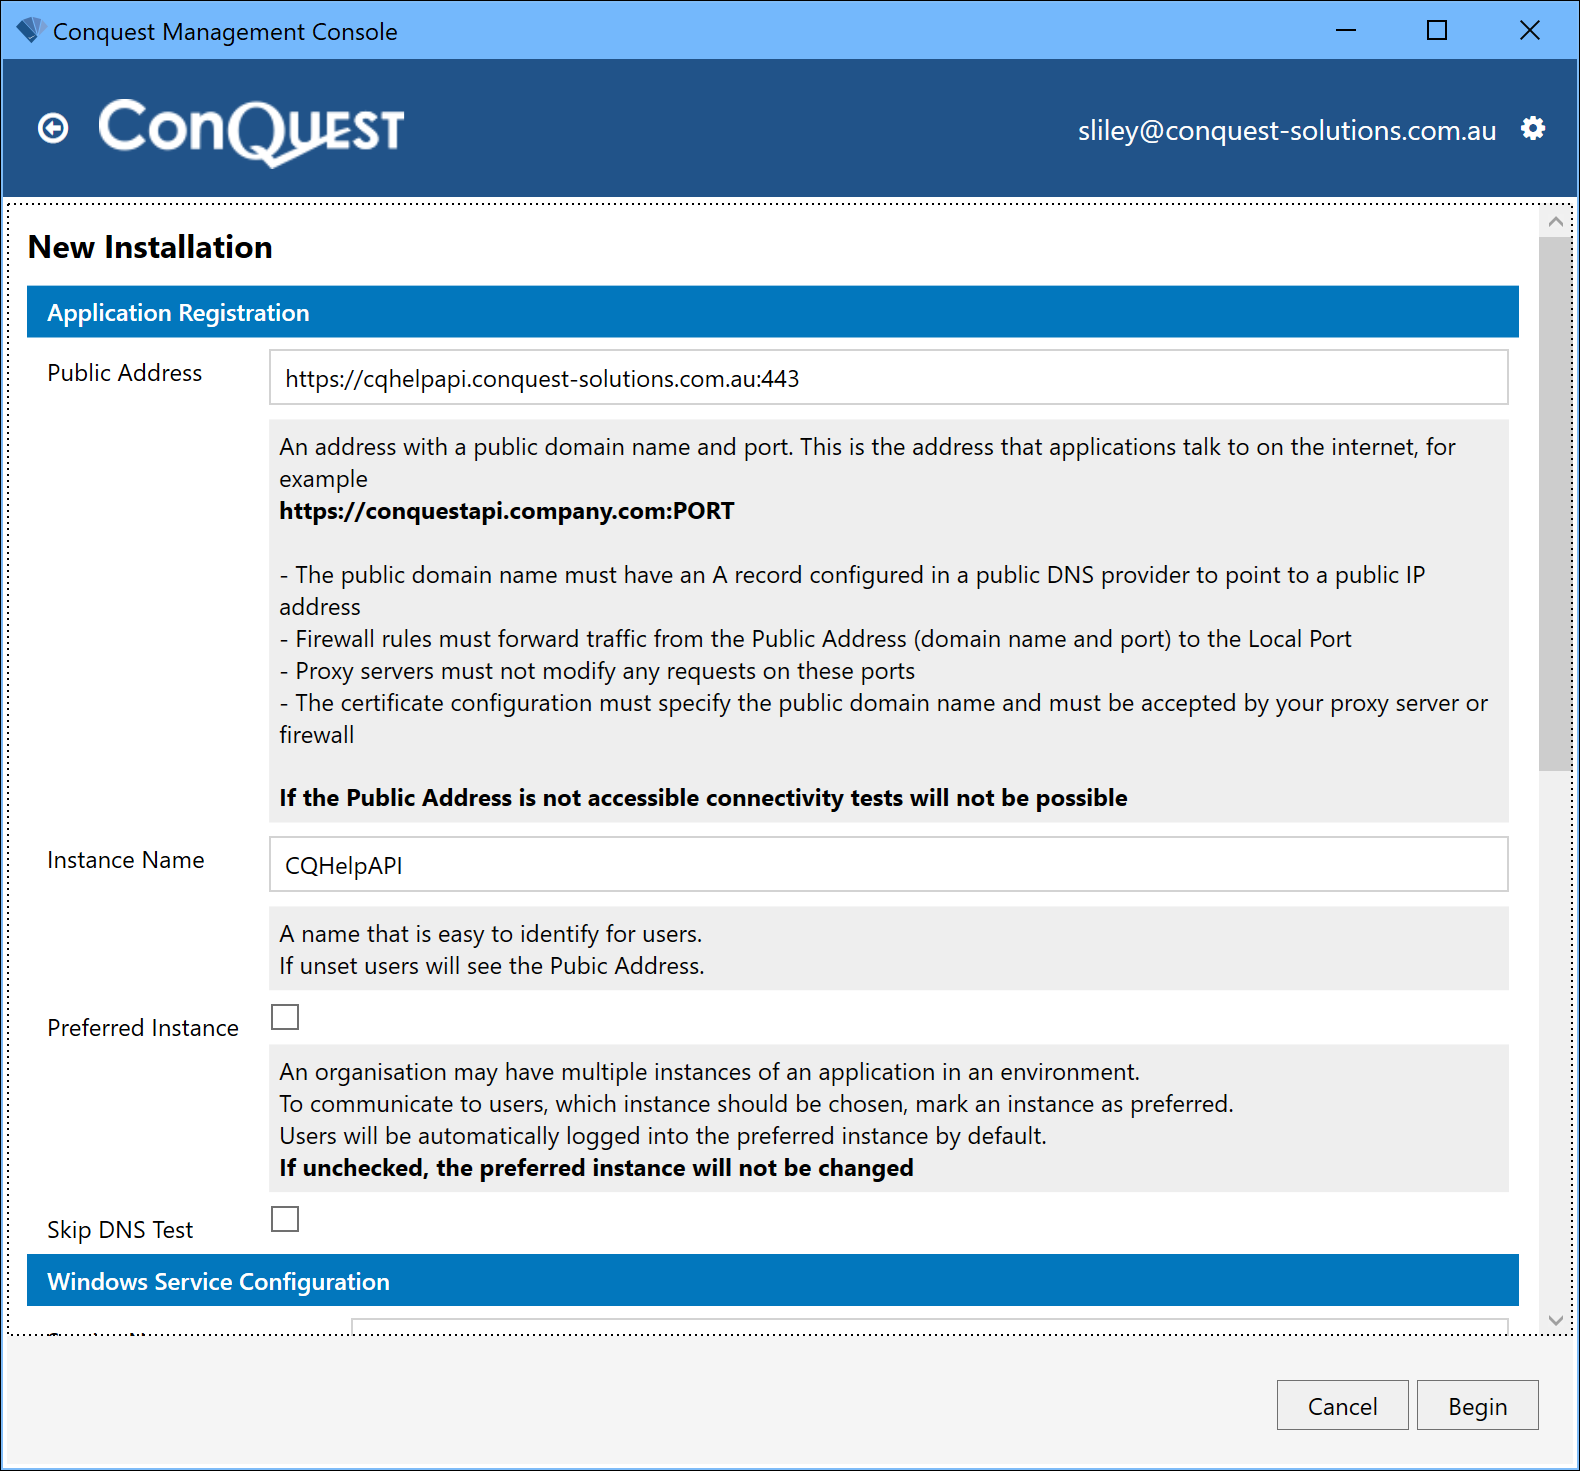
•Enter a Public Address, as per Step 2
•In the Instance Name field, give the Windows Service for the API a useful name; in this example “CQHelpAPI”
•If the API is to be used for your Production Database, tick the ‘Set as Production’ checkbox
•If you are having difficulty getting the API to run, you can tick the Skip DNS Test checkbox, to get the installation done then use other tools to debug connectivity
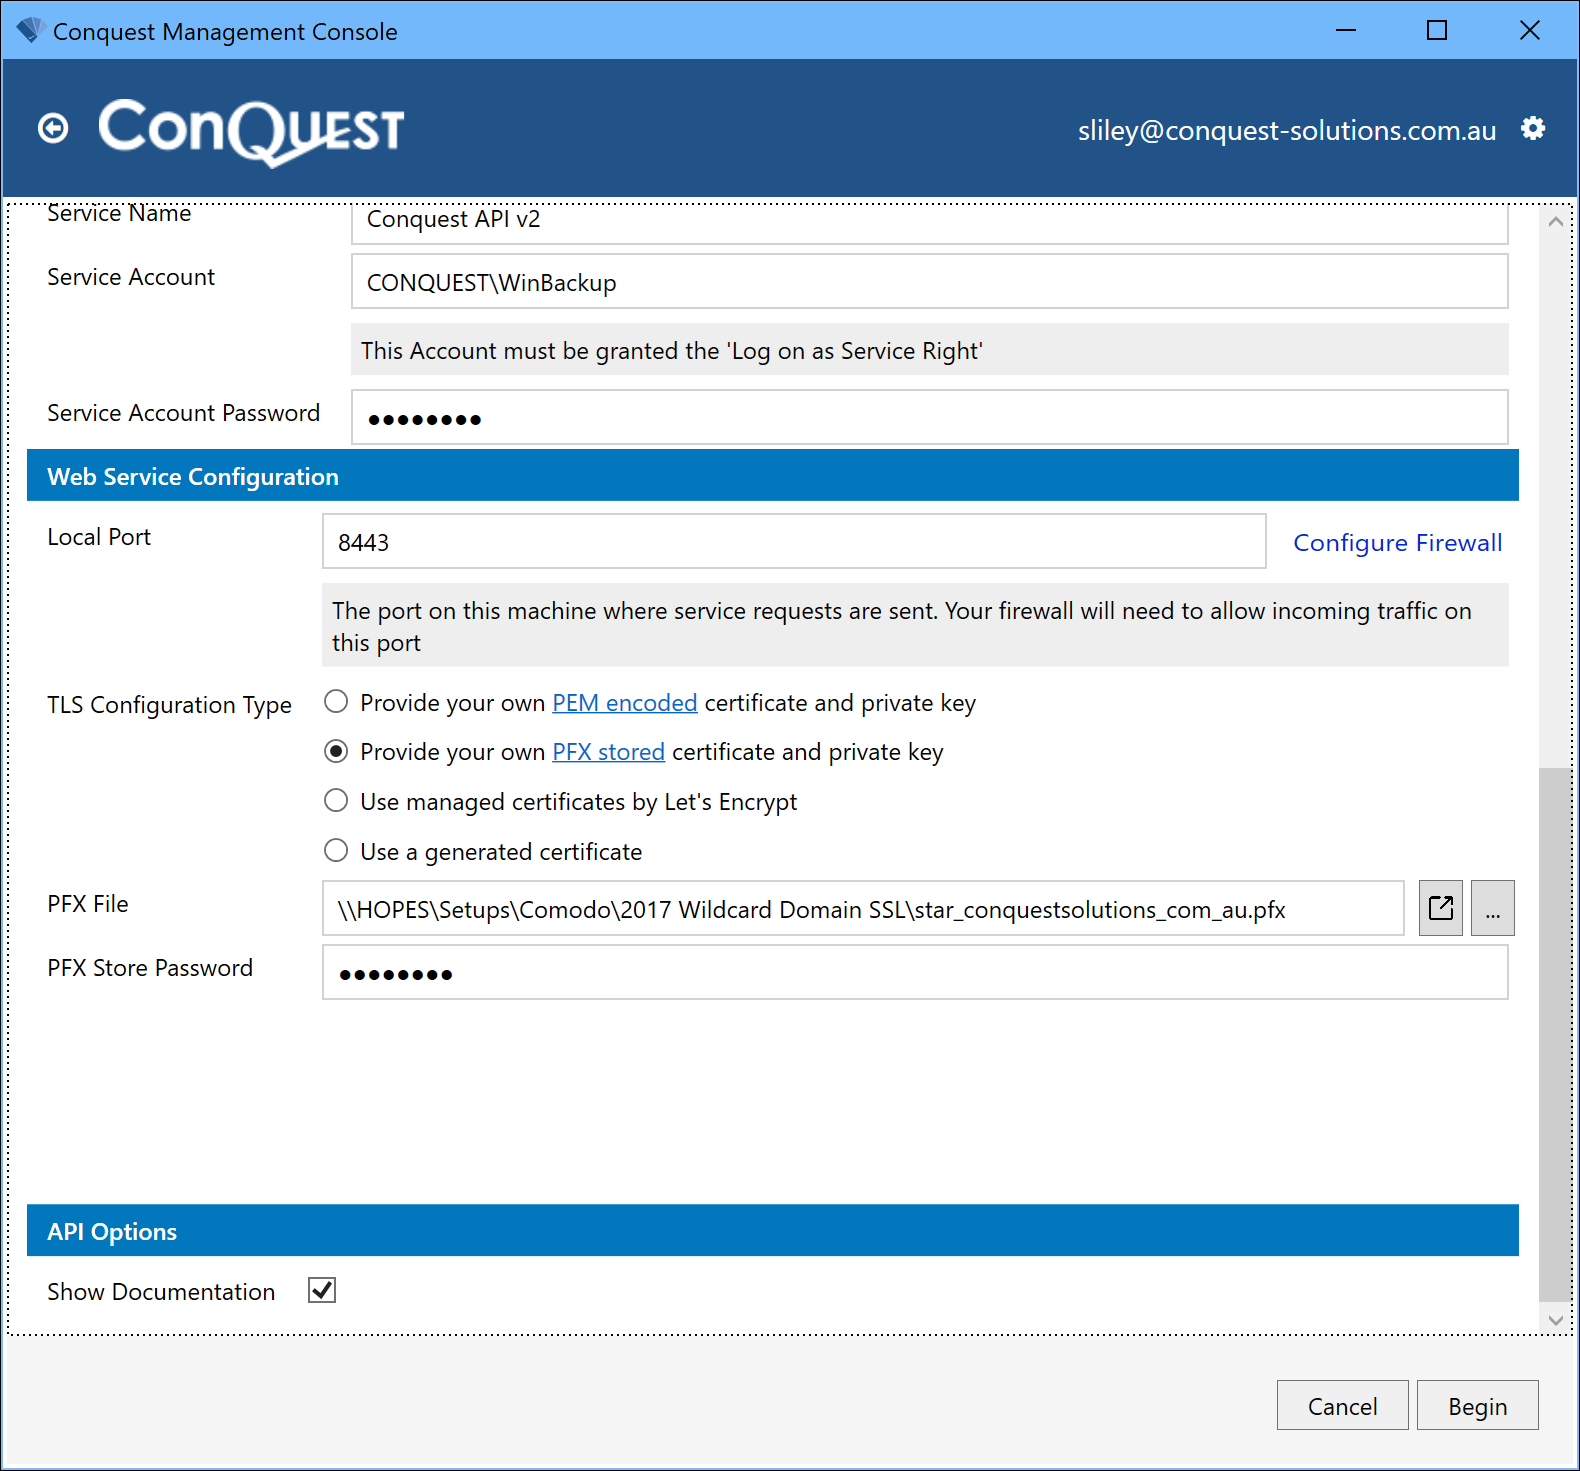
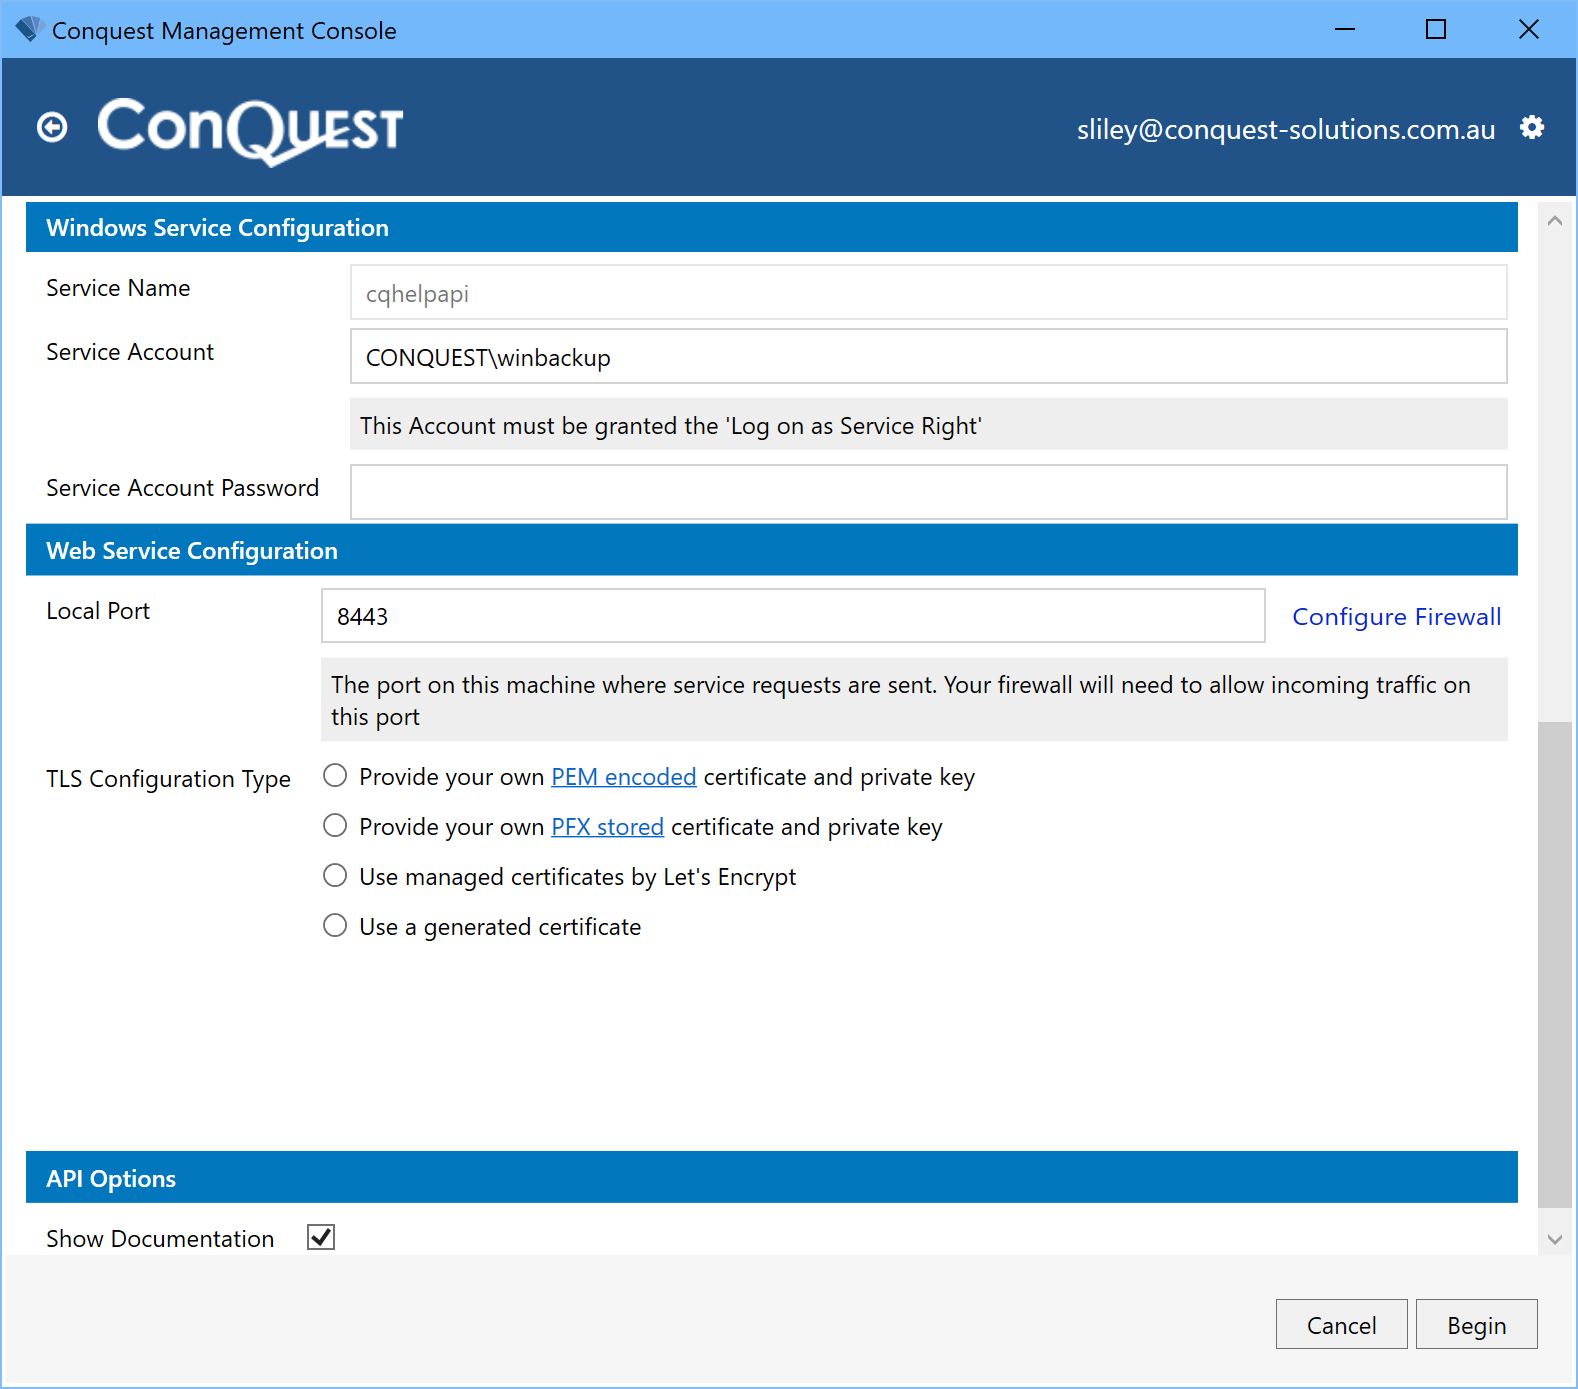
Drag the bottom of the Management Console window down, or use the slider-bar on the right, for more options:
•Enter the name of the Service Account, as per Step 4
•Set the Local Port mapping, as per Step 5
•Select the encryption certificate, as per Step 2. In this example we have used a .PFX file to access a .PEM certificate
•If you want to hide the Swagger Documentation provided by following the Public Address from a web browser, untick the Show Documentation checkbox
•Click Begin
•Click Close after the API is installed, which returns you to the Main Window
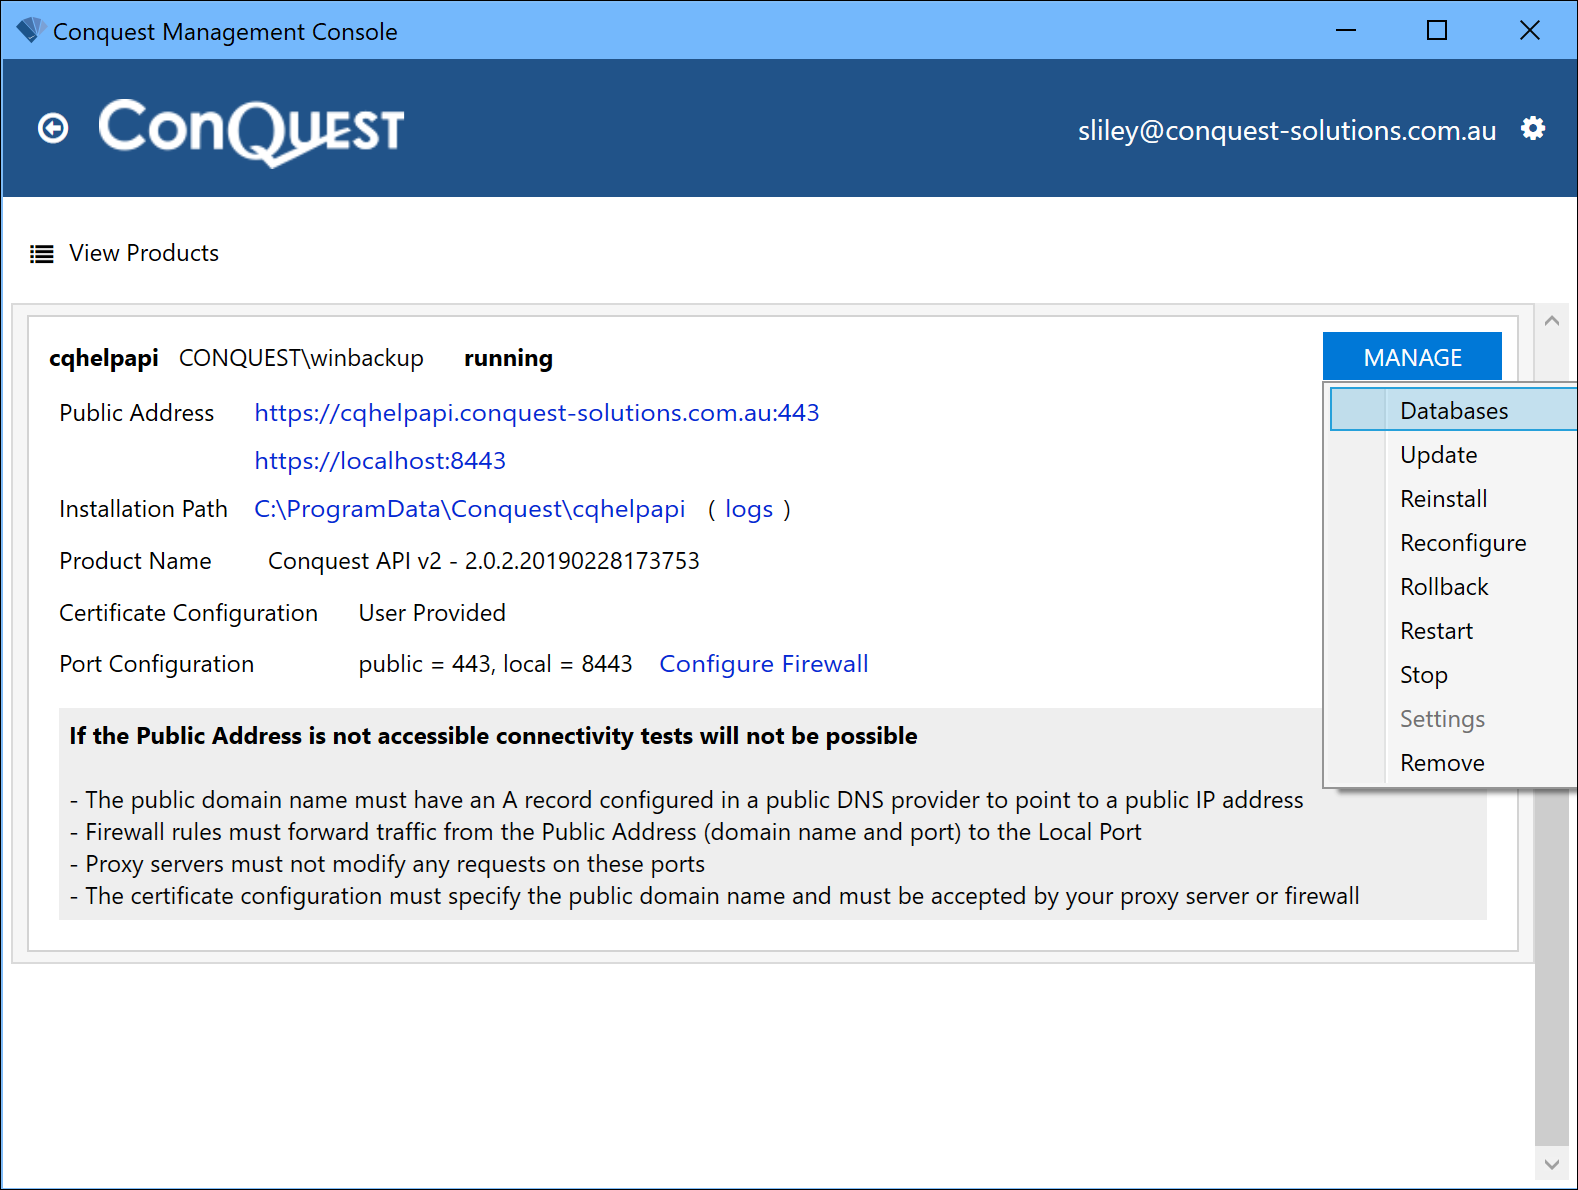
•Click inside the API rectangle, to select it:
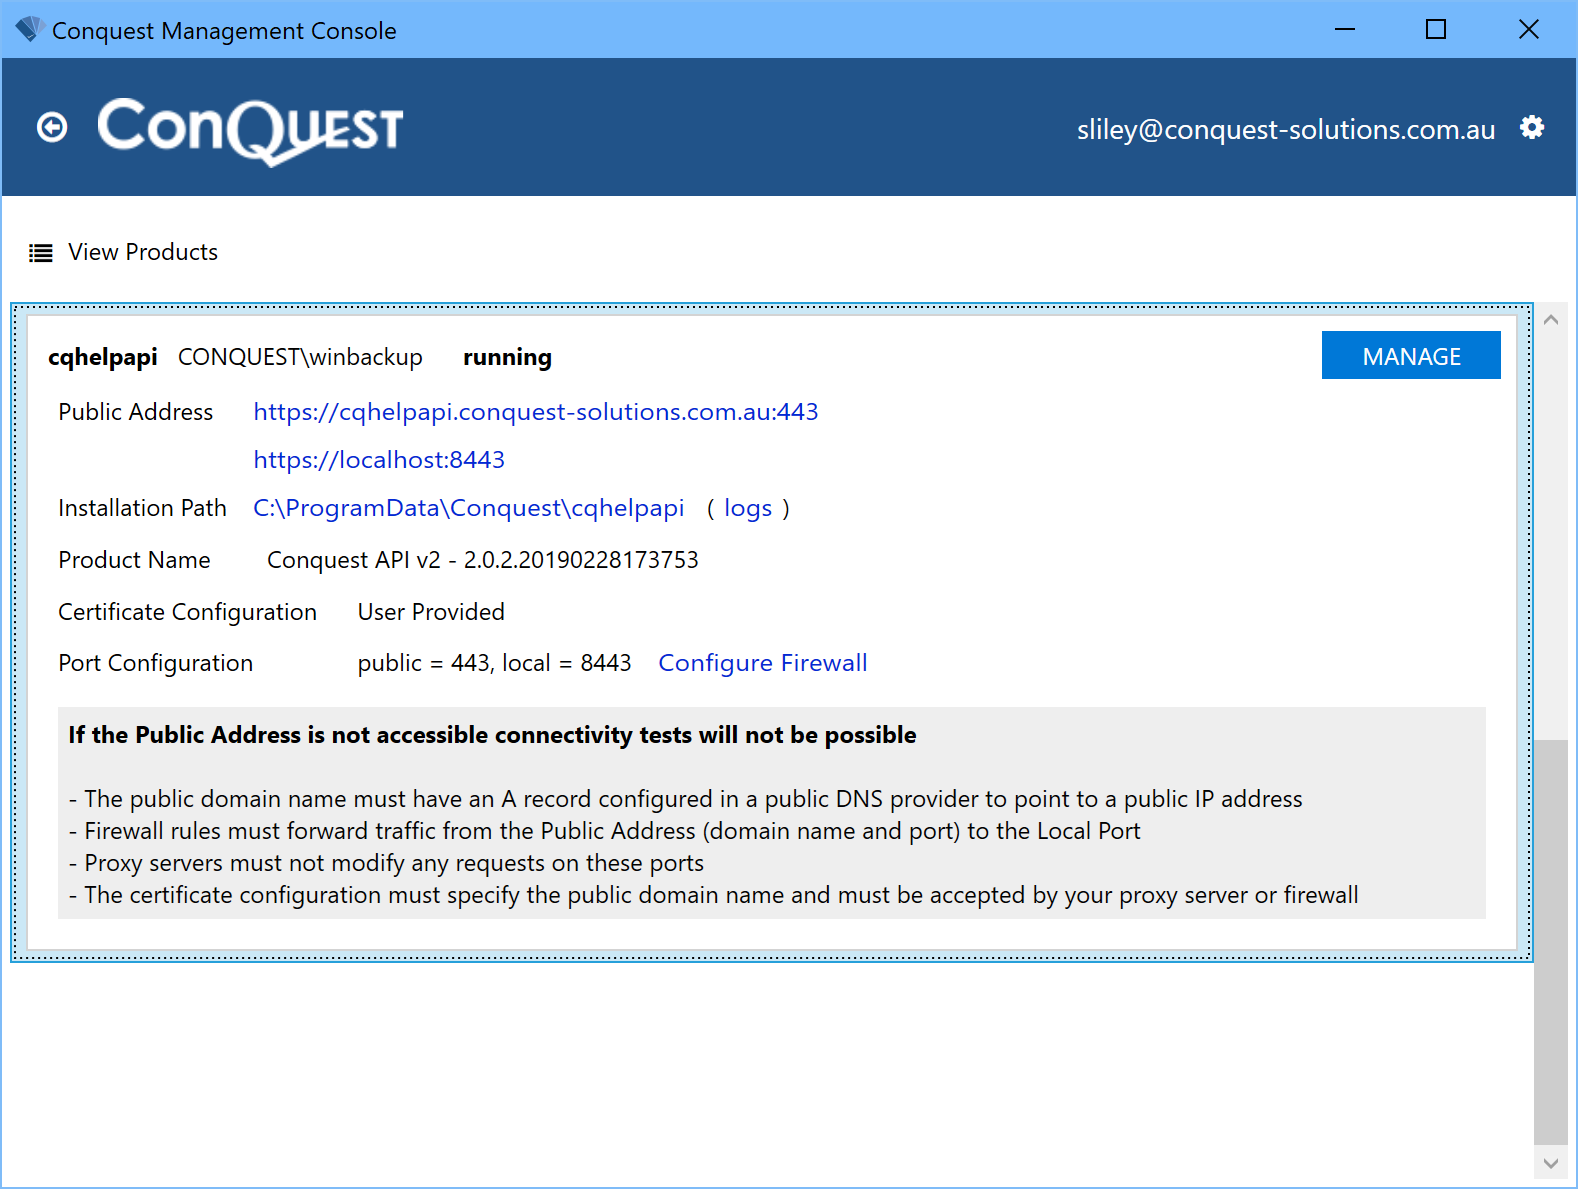
Note: If there is a red exclamation mark in the first line, instead of the word ‘running’, one of the Prerequisite Steps described in this guide, has not met the requirements, so go back and check. If you find and fix the problem, you will be able to start the API v2 service from the Windows Services tool. Otherwise call Conquest Support for assistance.
7. On your Perimeter Firewall, create a rule for Public User Access to your instance of API v2, via the Port of your choice. See API v2 Security for details. Test the rule, to make sure it resolves and, if not, investigate and correct it.
Give your API v2 a connection to a Database:
•Click inside the rectangle of the API instance, to select it
•Click Manage > Databases
•Create the Connection. See Web App Connections for details
•You’re done. See Databases for more about Database Connections
If you want to change an API v2 instance, use the Manage button - Reconfigure option to:

•Re-register the API instance with Conquest Services for Conquest Licences
•Enter or select the parameter(s) that you want to change
•Click Begin and, after the API is configured, Click Close, which returns you to the Main Window
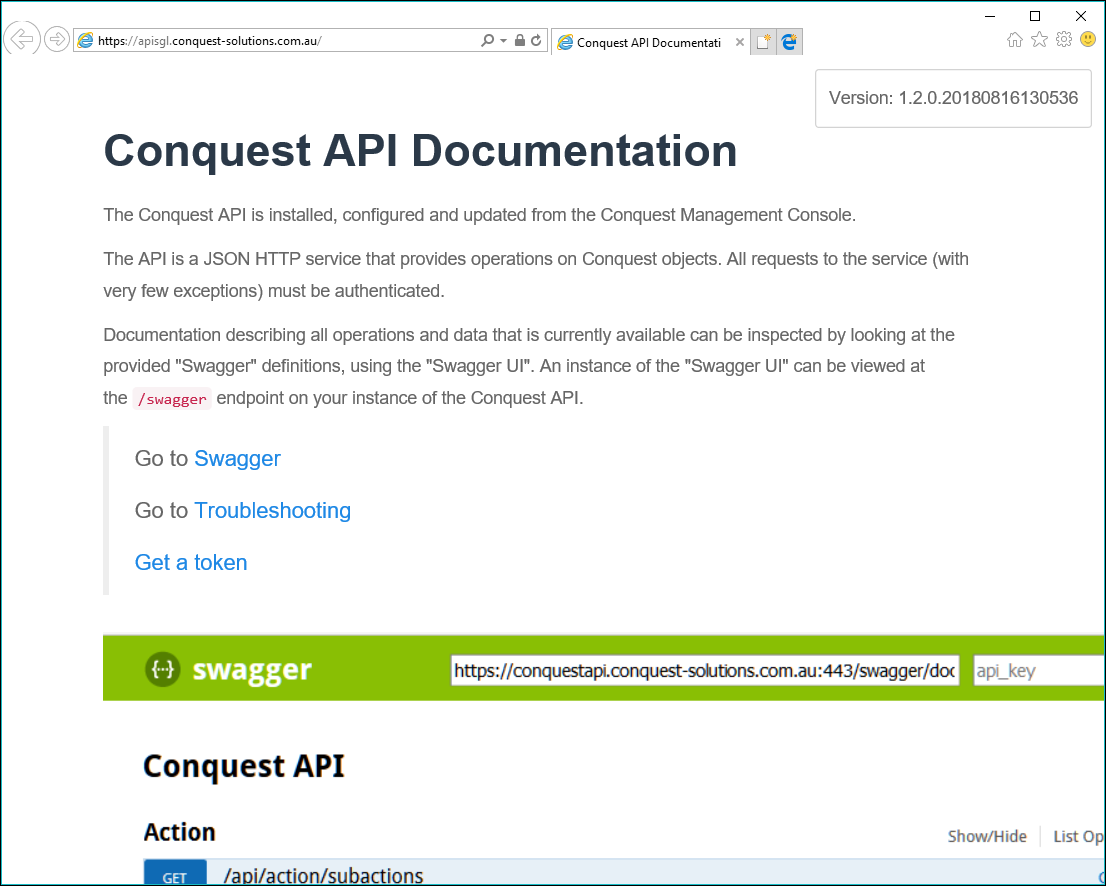
Test the API by clicking on the Public Address link, which should display the API - Swagger Documentation in your web browser, provided it has not been turned off by unticking the Show Documentation checkbox.