Each Conquest Web App, except CMTPC, requires at least one Connection to provide access to a SQL Server database:

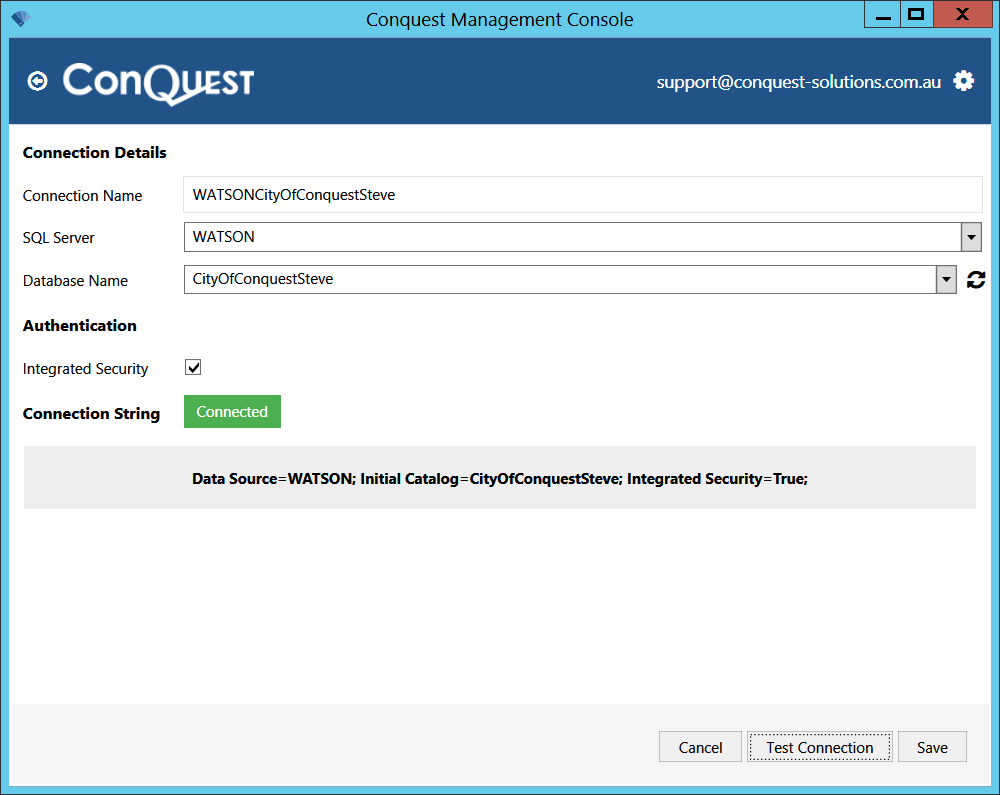
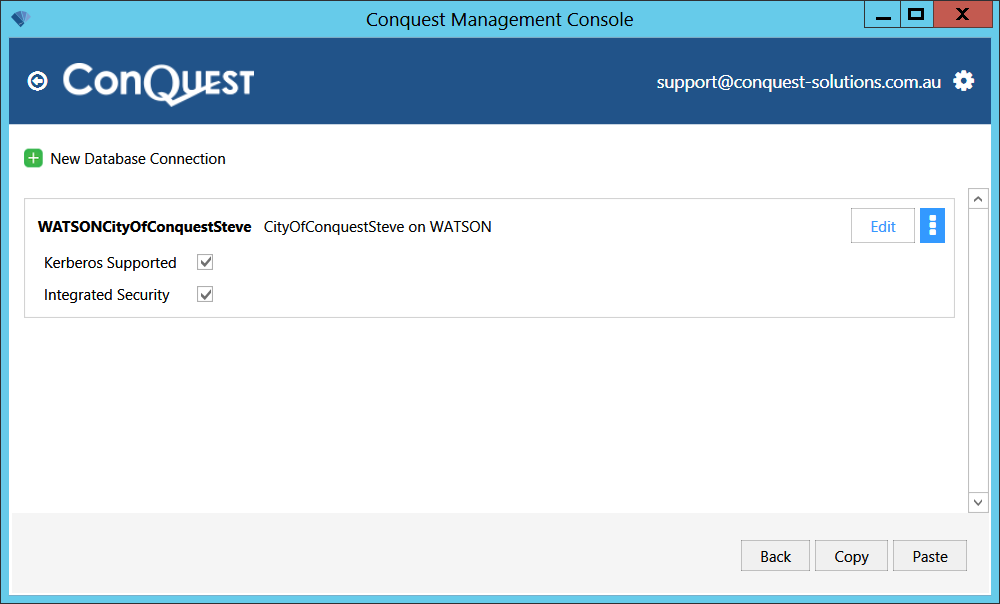
•To make a new Database Connection, click ‘New Database Connection’ and do the following:
•Enter the ‘SQL Server’ name
•For the Management Console to test the connection successfully, you need to select a Conquest Database from the ‘Database Name’ list that you have permission to log in to with Windows Integrated Security
•You can quickly set the ‘Connection Name’ with two copy/pastes; first the ‘SQL Server’ then concatenate it with the ‘Database Name’
•Leave ‘Integrated Security’ ticked
•Click ‘Test Connection’
•If you get “Green - Connected”, click ‘Save’. Otherwise, identify the problem, solve it and test again

•To change a Database Connection, click the ‘Edit’ button and make changes

•You can Copy the Connection that you have selected then navigate to another instance of Conquest III and Paste it there. This is particularly useful, when setting up the Conquest API, which must have a duplicate Connection to a Conquest III instance, to support use of the Conquest Work Planner