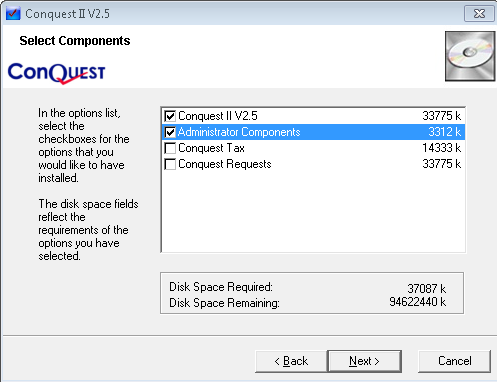
Step 1. In Custom mode the installation process gives dialog windows to set options and paths for key software components, depending on the components selected:
•Tick the Conquest II V2.5 option (default) to install the full Asset Management functionality and a Desktop shortcut to launch it
•Tick the “Administrative Installation” option, if the Conquest release notes and/or “What’s New” in the Conquest Help state that either of; the Conquest SQL Server database or the Conquest Reports Library need upgrading. See the Upgrade the Back End and Upgrade the Reports pages for more details
•Don’t tick Conquest Tax without first contacting Conquest Support for more details, as it is a rarely used, licensed module, specifically for Water Authorities to calculate Tax and Depreciation
•Tick the Conquest Requests option for the licensed Request module, which is Conquest II with “Requests Only” functionality and a Desktop shortcut to launch it.
•When the required components have been ticked, click “Next”
Step 2. The Conquest II V2.5 installation creates folders and files:
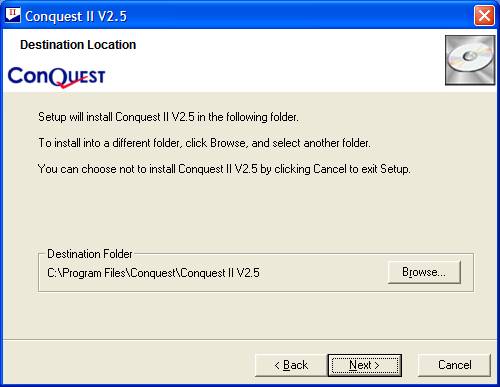
•To change the default Destination Location, click the “Browse” button and navigate accordingly
•Click “Next”
Step 3. Database Server and ODBC:
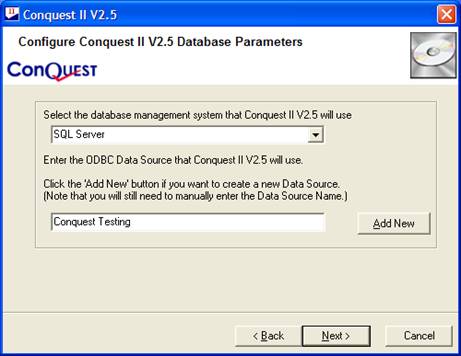
•SQL Server is the only choice of database server at this time
•The second field requires the exact name of a pre-existing ODBC data source definition to be entered. If this isn’t available then it can be created, without stopping the install process, by clicking the “Add New” button or it can be created after the installation has completed. For more details see the ODBC Data Source page
Step 4. Paths for Conquest II Library folders:
Conquest II uses a set of Master libraries to be copied to a user’s application data folder to provide exclusive use for a Conquest Session. This enables the Conquest Administrator to make changes to functionality within a Master library without interrupting users’ operations.
Note: It is highly recommended that the “UserInterface.mdb” and “Conquest Reports.mdb” files are always located on a network drive to which the Conquest users have read/write access. This will remove the risk of having multiple Master libraries on local machines, which could become unsynchronized with each other and the version of Conquest II being used, leading to errors and delays. For more details see the Conquest File Structure page.
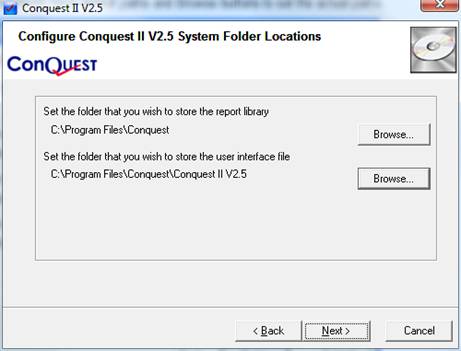
•Use the “Browse buttons to set a Network location so that a UNC path is created for each Master library file, which is:
•The location of the shared folder to hold the Conquest Reports Library
•The location of the shared folder to hold the Conquest Interface Library