Do the following:
Step 1. Open the Asset Type form to Edit each Asset Type
Step 2. Click on the Inspection Tab and edit the Defect Inspection Frequency based on the Priorities assigned to your Assets
Step 3. If you haven’t already done so, set up Standard Defects for each Asset Type. See How To Set Up Standard Defects for details
Step 4. Open the Asset Form for an Asset that you want to record a Defect Inspection for as follows:
•Click on it in the Asset Explorer. See Asset Explorer for details
•Double-Click on it in a Standard List of Assets. See How To Use a Standard List for more details
•Click on it in the Favourites List. See The Favourites List for more details
•Click on it in the Recently Viewed List. See The Recently Viewed List for more details
Step 5. Click the Edit button
Step 6. Click on the Inspection Tab, where you will see three or more grey, expander bars
Step 7. Click the New > Defect Task and choose from the list of Standard Defects available for the Asset Type
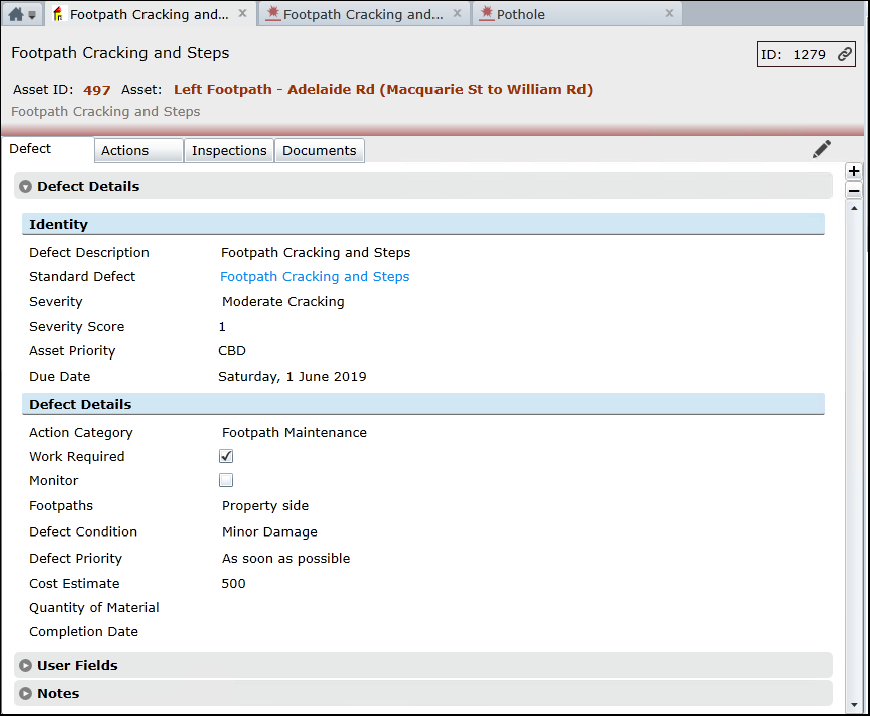
Step 8. Edit the Defect Description or leave it, as you see fit
Step 9. Choose the Severity Level from the list defined on the Standard Defect
Step 10. Choose an Action Category (optional)
Step 11. If you intend to work on the Defect right away, tick the Work Required checkbox
Step 12. If you don’t intend to work on the Defect right away, tick the Monitor checkbox
Step 13. Choose the Asset sub-location from the Element List set up on the Asset Type; in this case “Footpaths”
Step 14. Choose from the Defect Condition List
Step 15. Choose from the Defect Priority List
Step 16. Enter the Cost Estimate (optional)
Step 17. Enter the Quantity of Material (optional)
Step 18. Enter data or choose from lists in the User Fields Tab, if you have any
Step 19. Enter in Defect Notes, if you have any
Things to be aware of:
See the Defects Reference for more details.
You must first set up a schedule for Defect Inspections of the relevant Asset Types. See Asset Type Form - Inspection Tab for details. Assets need to have been given their Priority too. See How To Add an Asset for details.
The Inspection Date in the Defect Inspection section, relates to the date a Defect Inspection was carried out on the Asset.
Conquest Administrators can set up Views of Defect Inspections on Assets that are due for Defect inspections e.g. Where Next Defect Inspection is less than Today, and advise the inspectors to set these as Favourites in Conquest III and check them at regular intervals.
You can check the Information about a previous Defect Inspection, from the Asset Form Inspection Tab by clicking on it.
Creating a Defect against an Asset will record a Defect Inspection for that Asset and the Next Defect Inspection date will be generated based on the schedule set for the Priority of the Asset.
Defect Inspections can be carried out with Conquest Mobile then uploaded to Conquest.
Importing Defects will also create a Defect Inspection.