API v1 is still available for the Conquest Work Planner. API v2 is the next generation of Conquest API, built for Mobile Conquest. You can install both versions.
Start The Conquest Management Console.
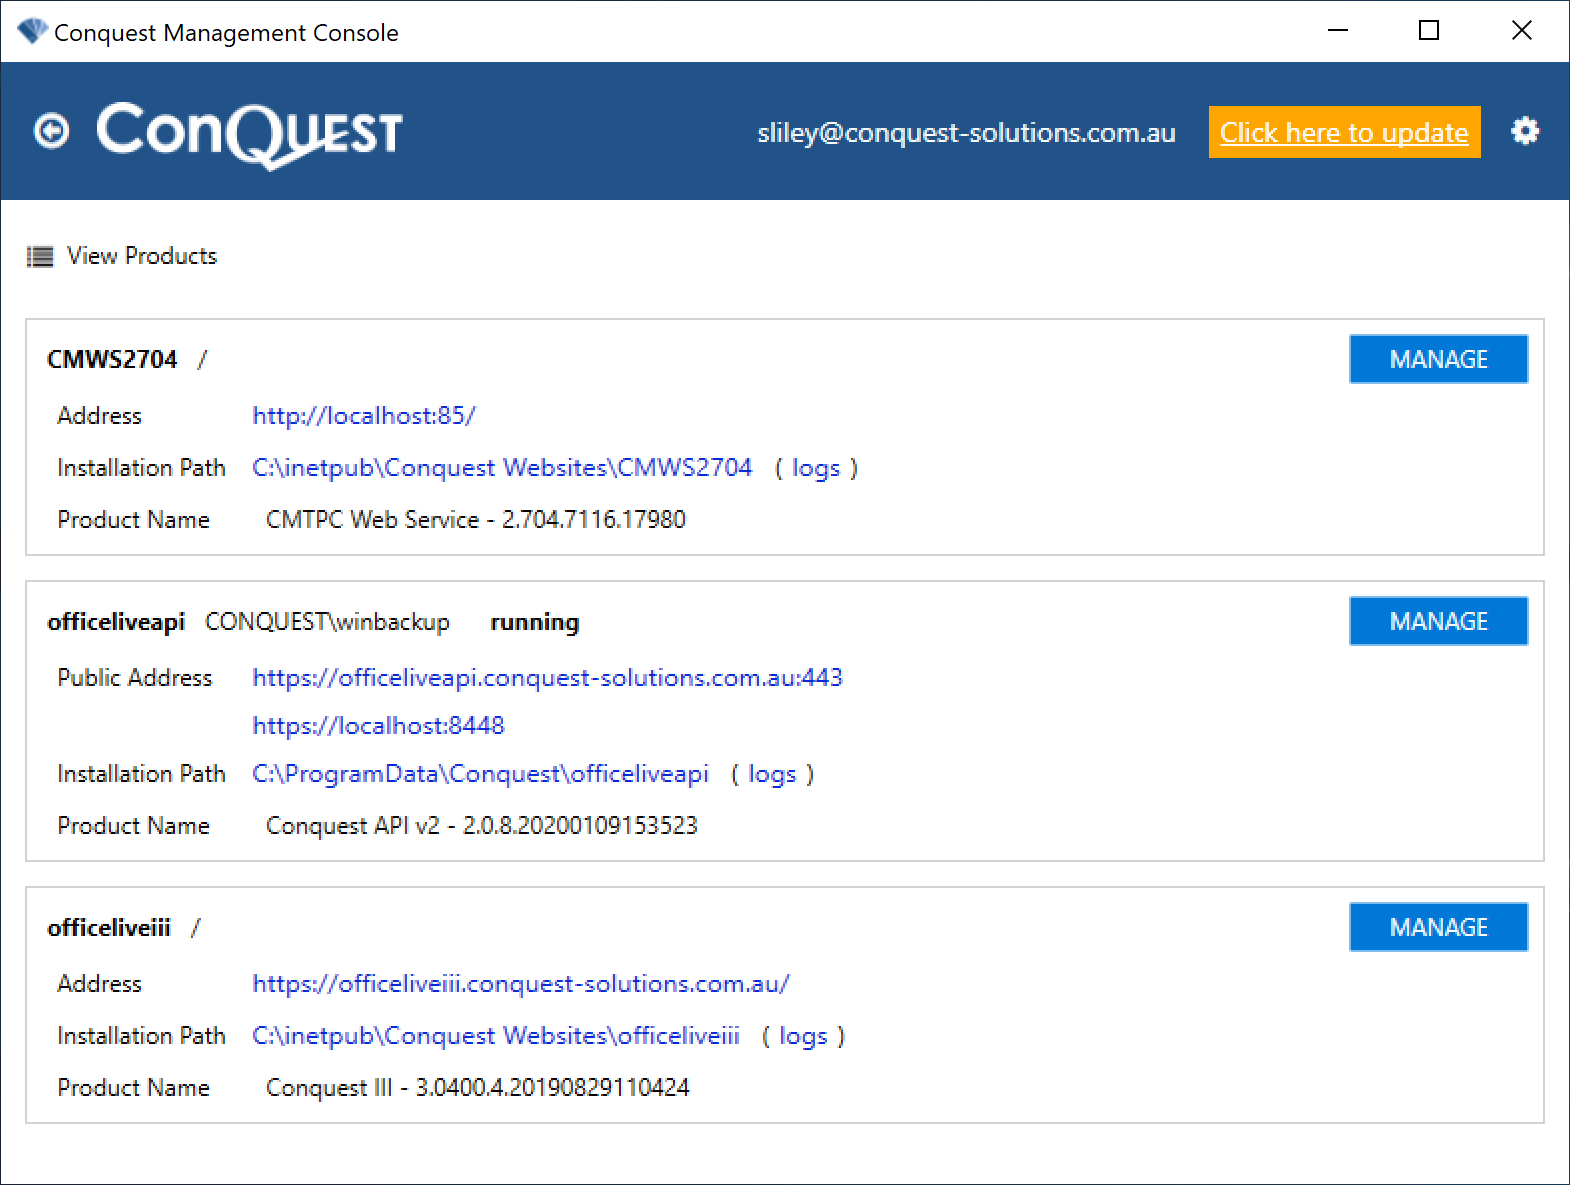
If you see Click here to update in the Form Header, please do so:
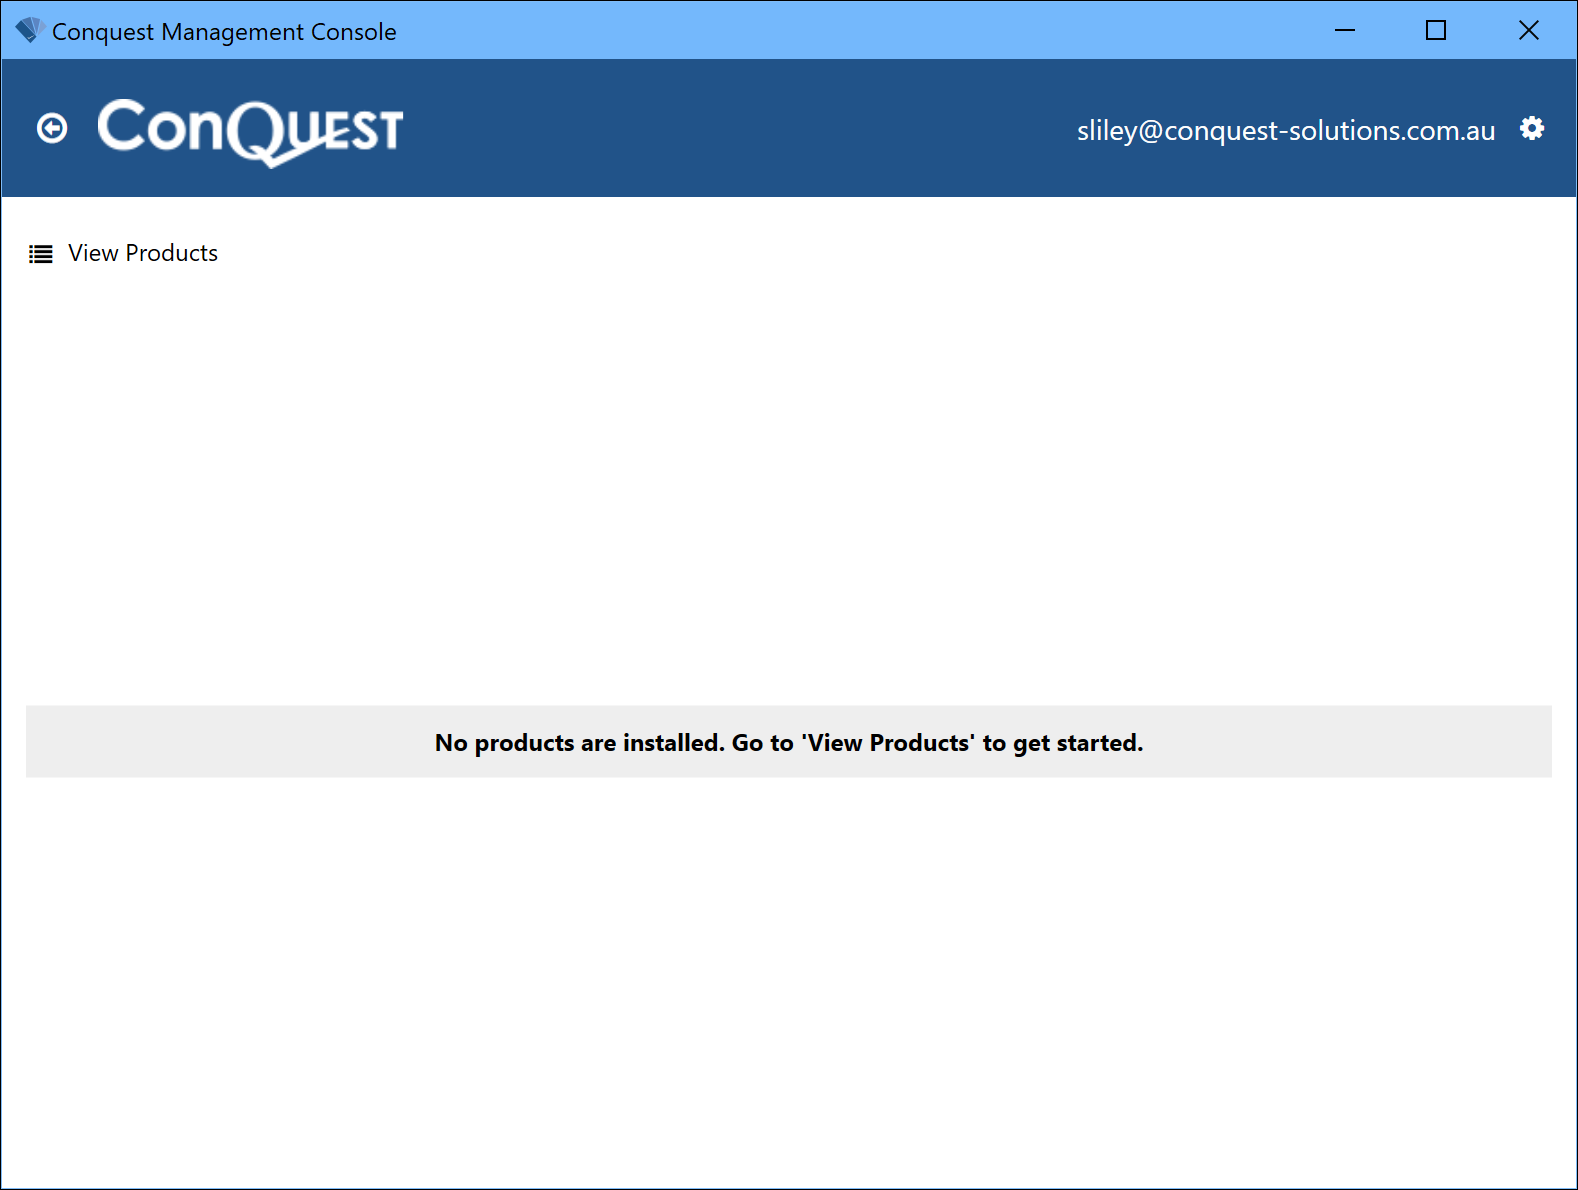
If this is your first use of it, the Management Console will look empty:
•Click the View Products button
![]()
•Select the latest version of the Conquest API e.g. 1.1.5 from its Product pick-list, and wait for it to show as being selected:
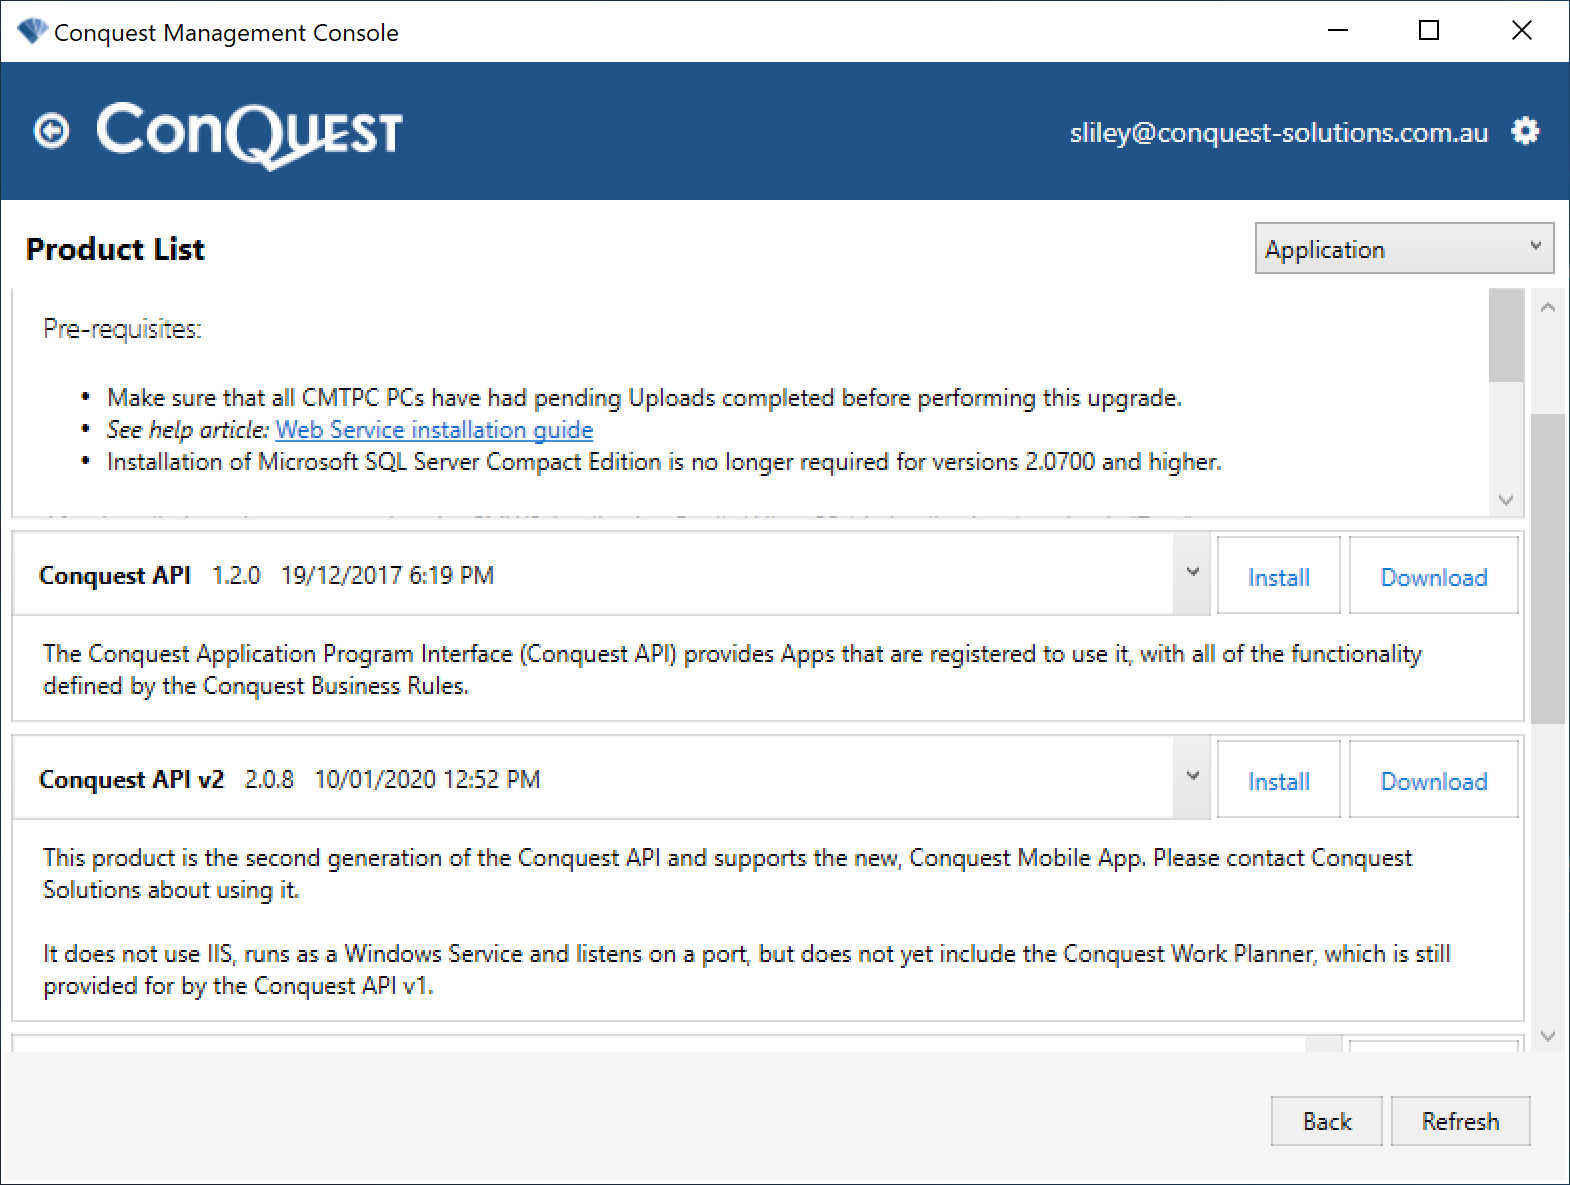
•Click ‘Install’, to open the ‘New Installation’ Form for the API:
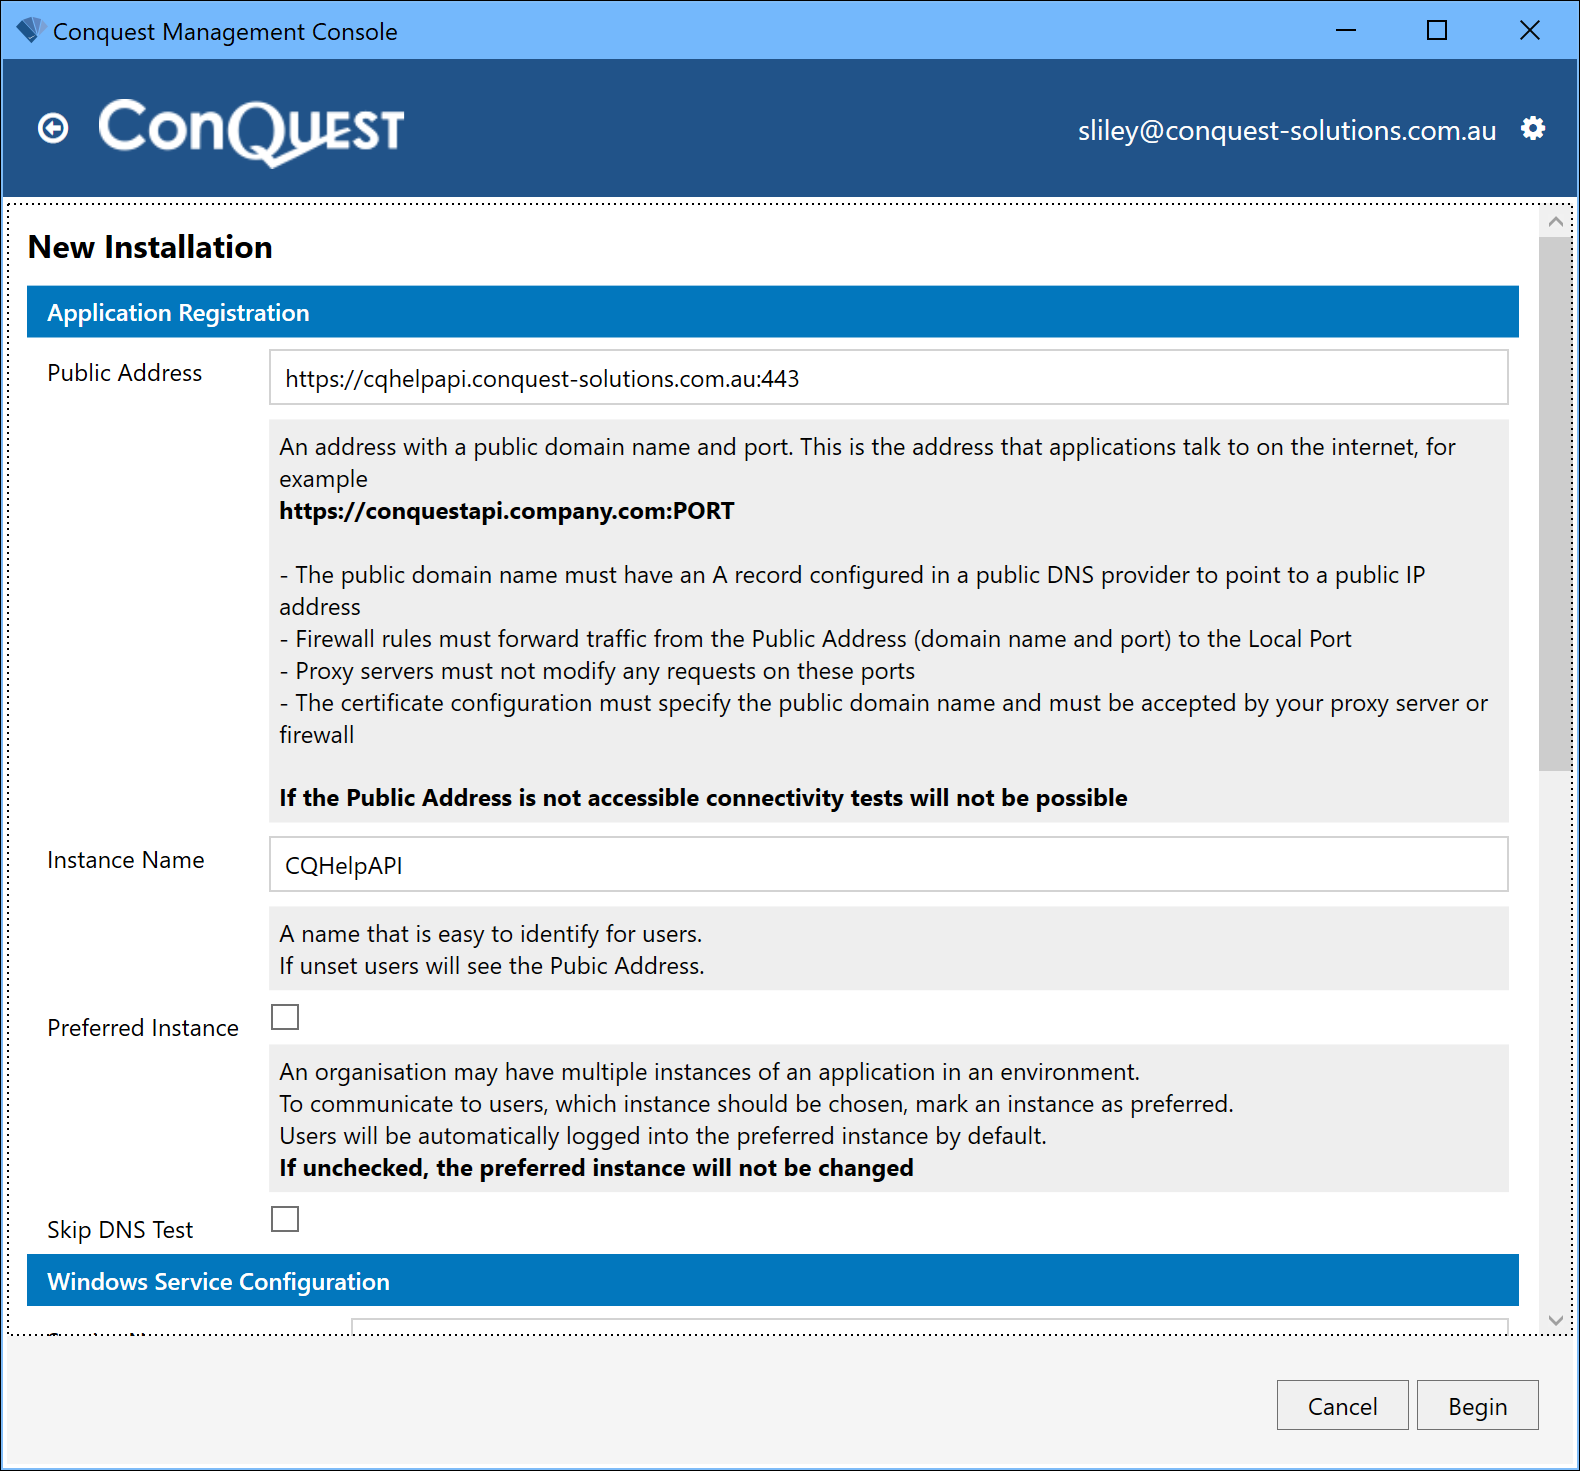
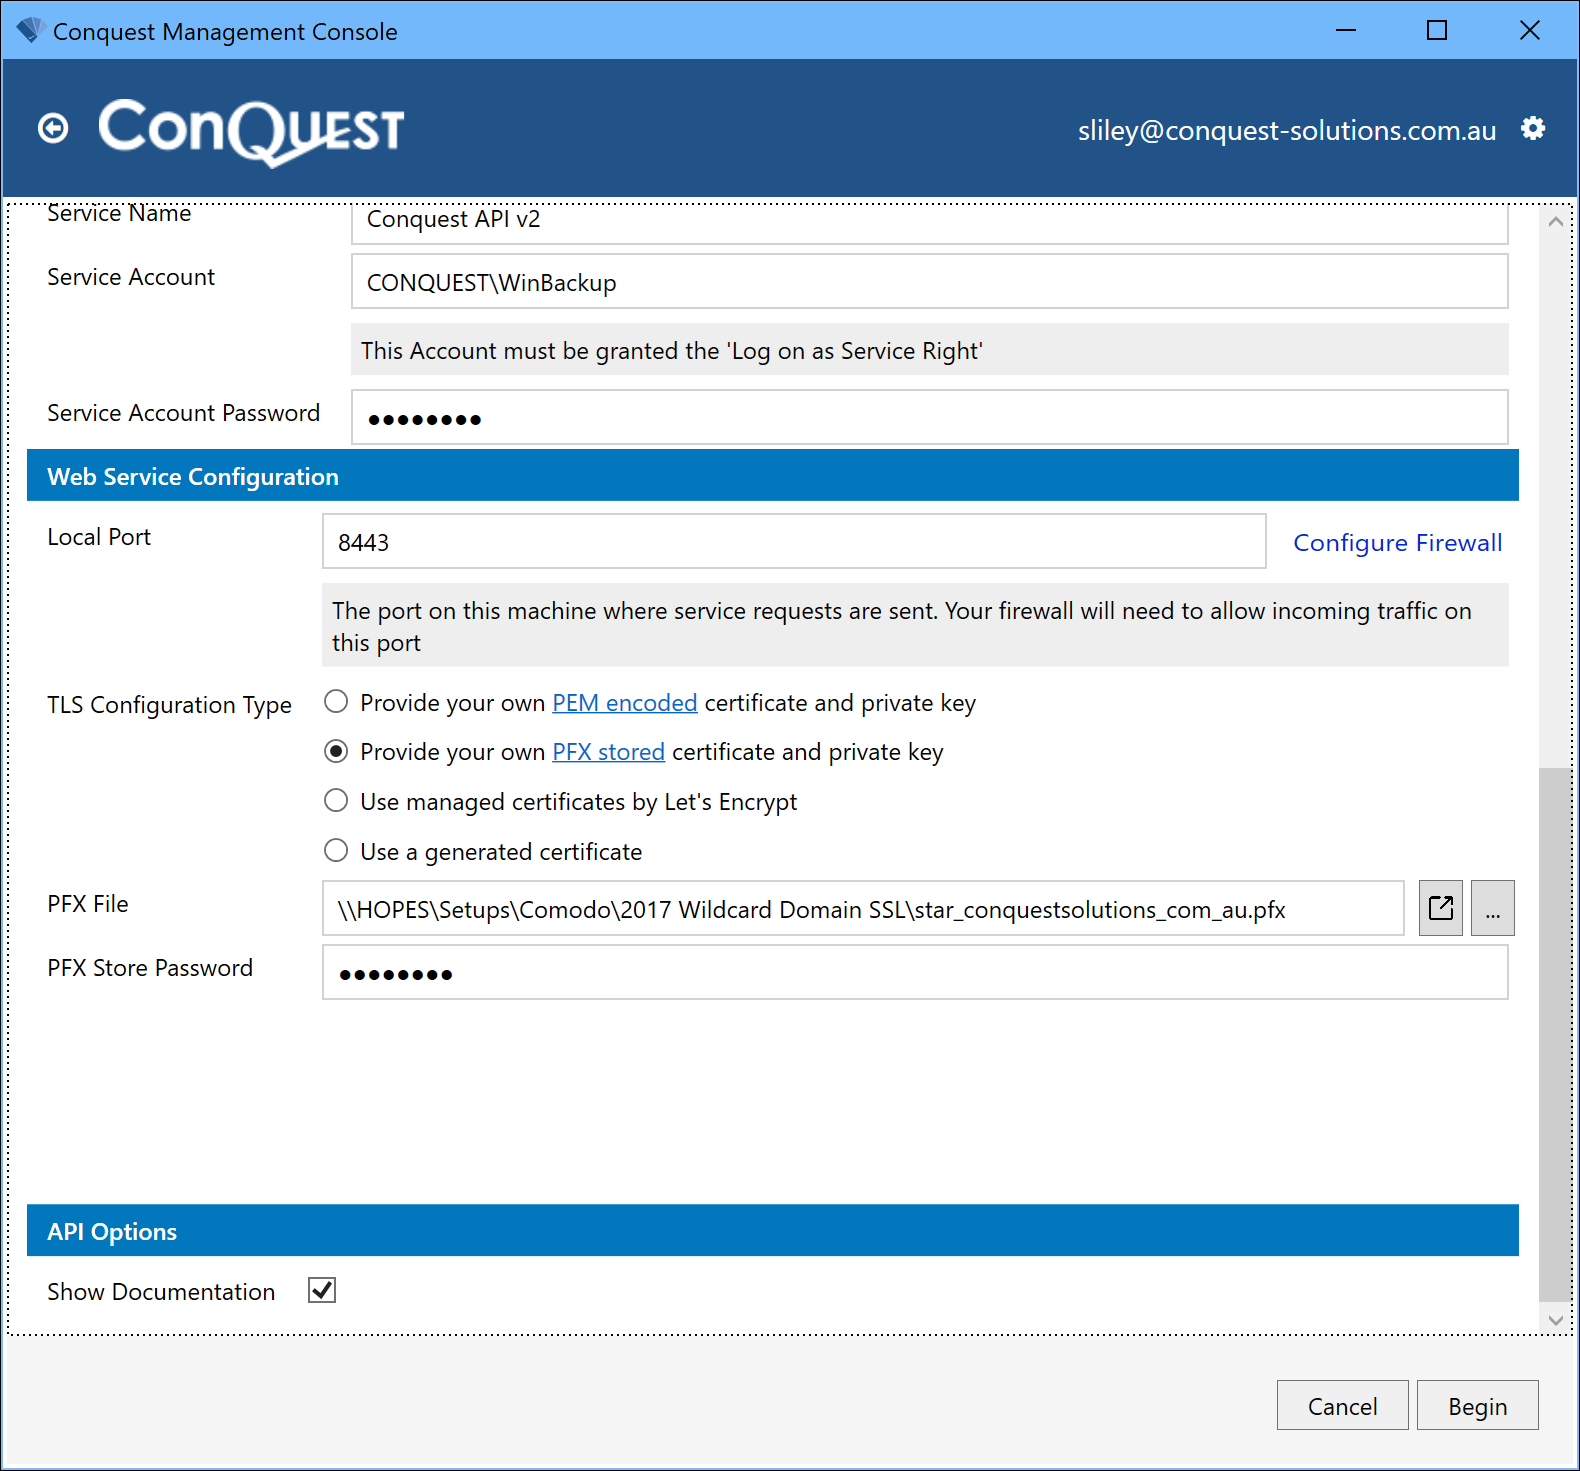
•The Physical Path defines the folder location for the API components. The folder can be named the same as the API web site name
•Enter the identification and credentials for the API web site to:
•Give it a suitable name
•Provide a service account for the Application Pool, with normal Conquest User (or Conquest Administrator) access to the Conquest file storage locations and to the database. It is a case-sensitive name
•Create an HTTPS Binding based on a signed Transport Layer Security (TLS-02) Certificate. The API will not operate securely without this and nor will the Conquest Work Planner operate
•Un-tick the ‘Passthrough authentication’ checkbox and tick the ‘Anonymous authentication’ checkbox (Default)
•Provide a service account name for anonymous authentication, with security group access to the Conquest file storage locations and database. It is a case-sensitive name from Active Directory. In this case, the same Service Account is used for both the Application Pool Identity and for Anonymous Authentication:
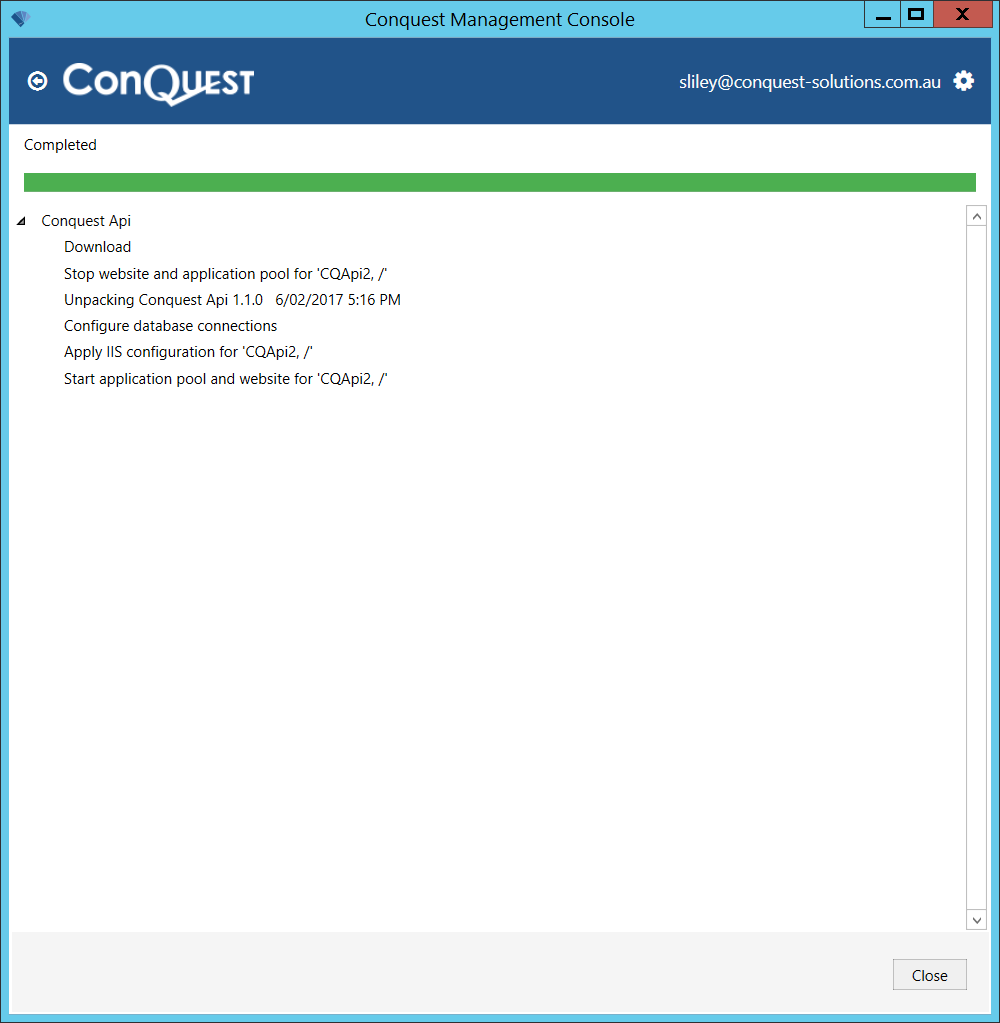
Click ‘Begin’, which depending on internet performance, may take a minute or so, to do the following:
•Validate the Web App configuration
•Download the Conquest API package. Note: This is a possible point of failure by loss of the internet feed. In this case, when the internet is available, click ‘Begin’, to try again
•Create the Web App and Application Pool
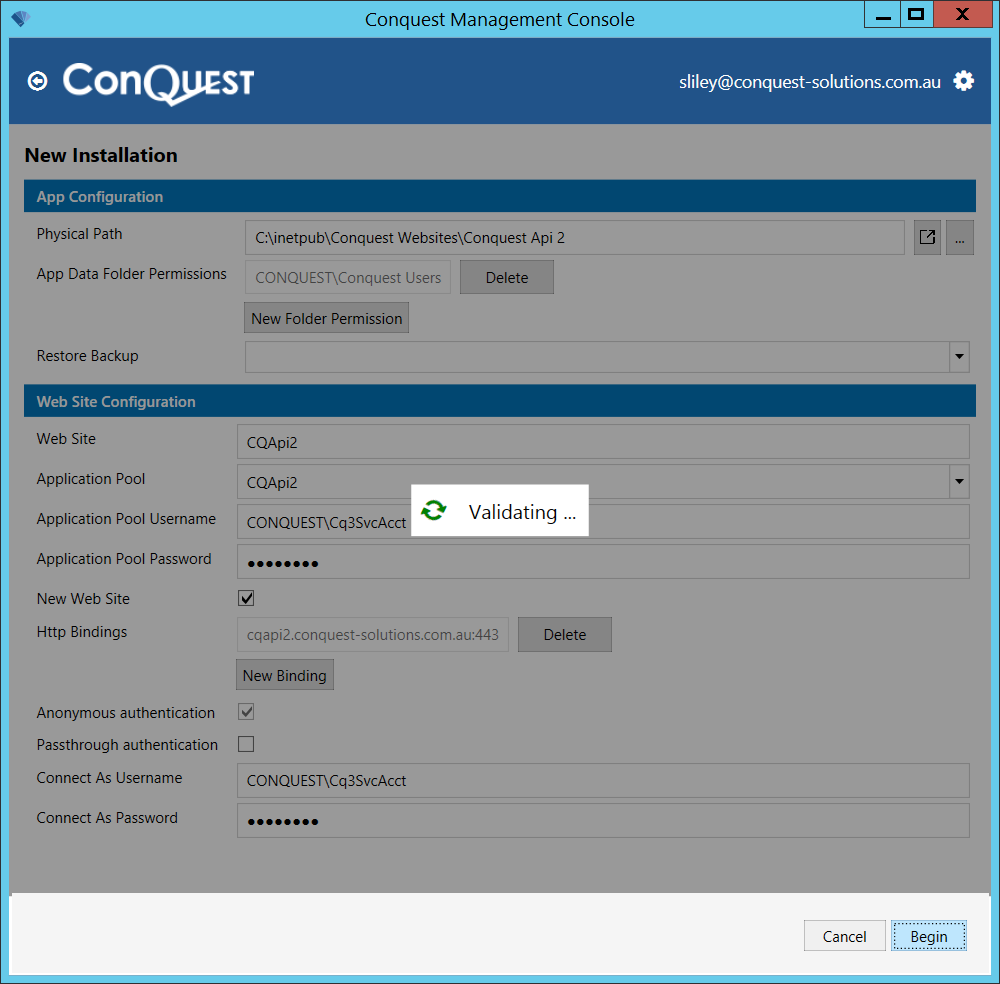
•If the validation gives an error, investigate and correct it
•Successful validation will set off the final part of the installation, which you can read then ‘Close’:
After an install or update, you must:
•Create at least one Database Connection, if it doesn’t yet exist, that is an exact match in name and the connection string within it, for every Conquest III Database Connection, where the Work Planner will be used
•Update the Licence
•Refresh System Objects
See Manage Menu for details