How To Connect To Power
BI
Connecting your Conquest Data to your Power BI reports can be
done with no installations and minimal effort. The entire process consists
of:
•
Creating a Power BI connector through Conquest 4
•
Using the connector in Power BI to load your data
Generating a Power BI connector
Conquest Power BI connectors are created and managed through
Conquest 4, on the Device Connections manager. To generate one:
Step 1. Open the Device
Connections manager in Conquest 4
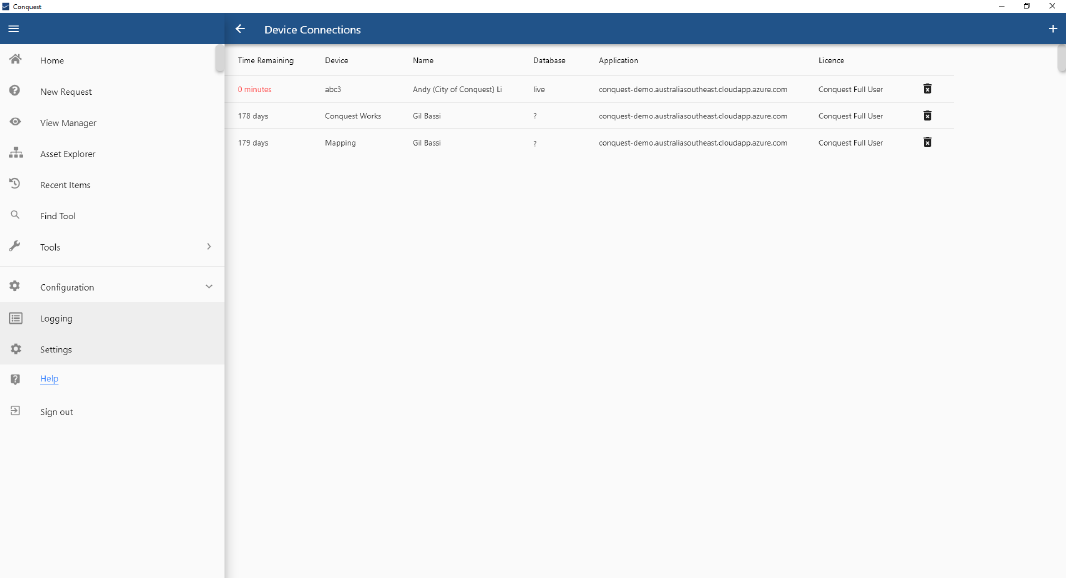
Step 2. Click on the Add
Connection icon on the top-right corner
Step 3. Enter a name for
the connector.
Hint: It is a good practice to clearly identify the
connectors, in order to revoke unused and obsolete ones
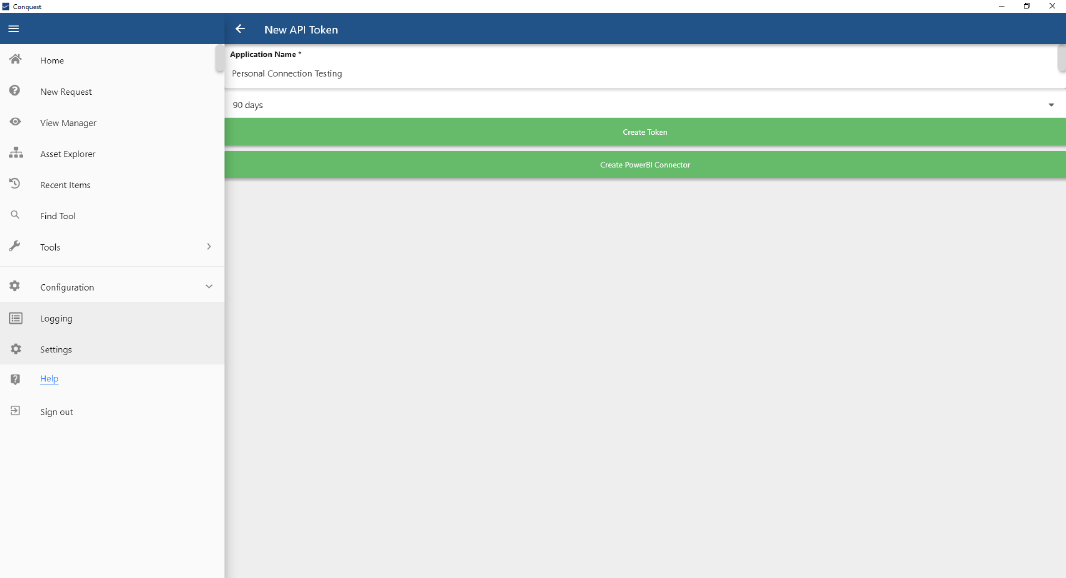
Step 4. Select the lifetime
of the connector.
Step 5. Click on Create
PowerBI Connector.
Step 6. Select the Custom
Connectors directory to save the connector.
Important: The Custom
Connectors folder location is defined by Microsoft, and it is by default under
“Documents\Power BI Desktop\Custom Connectors”.
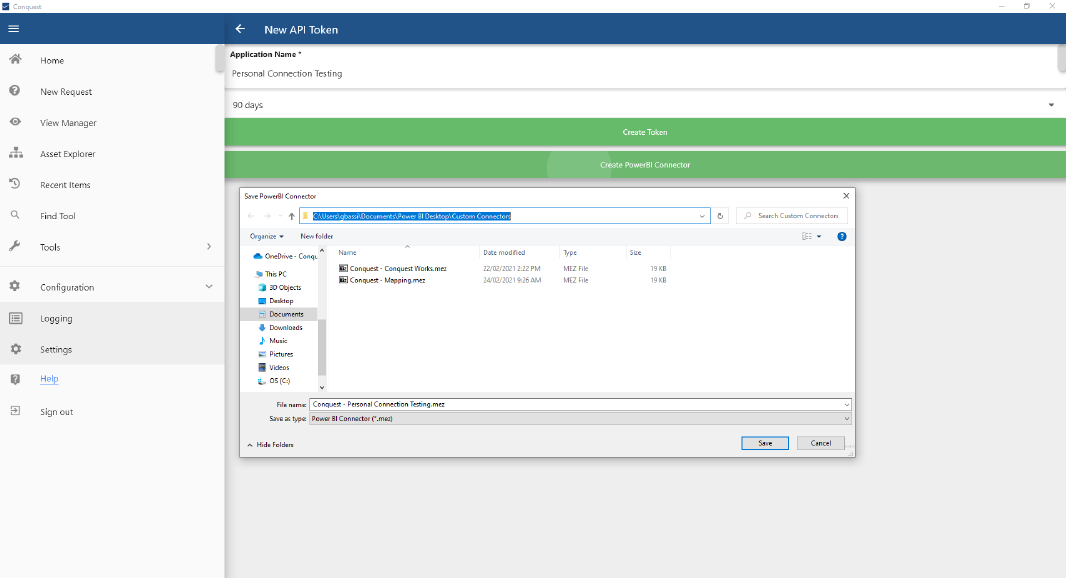
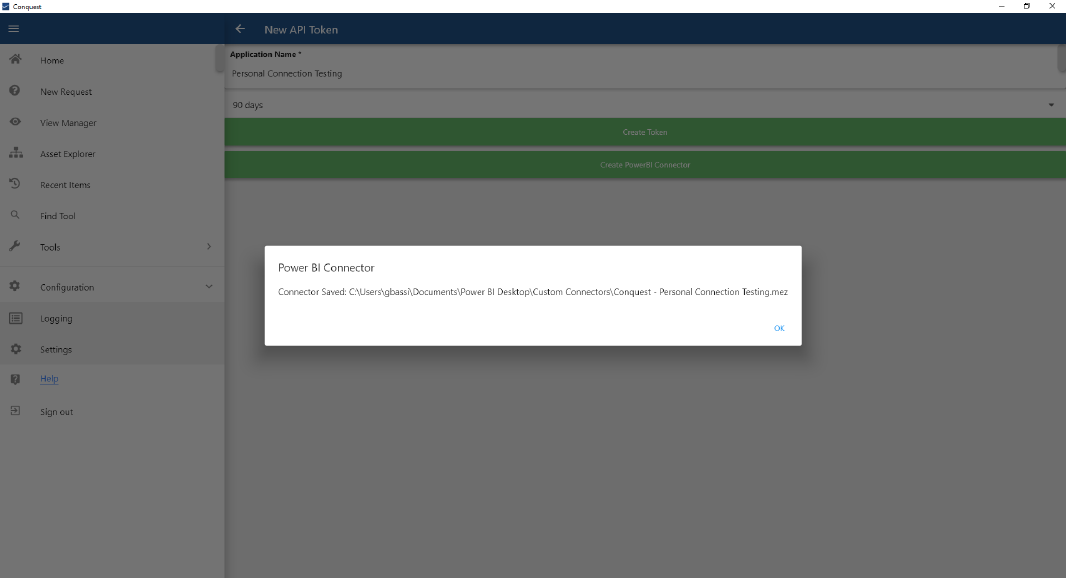
Step 7. Save the
connector
Using the connector in Power BI
With a connector created, you can access your data in Power
BI by:
Step 1. Open your Power BI
Desktop report
Step 2. Click on Get
data on the Home menu
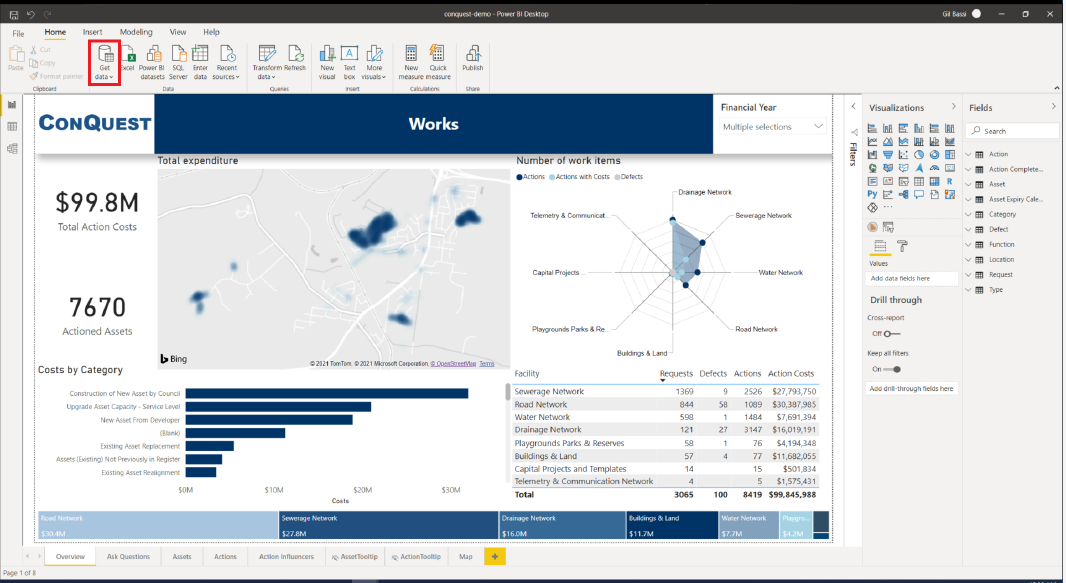
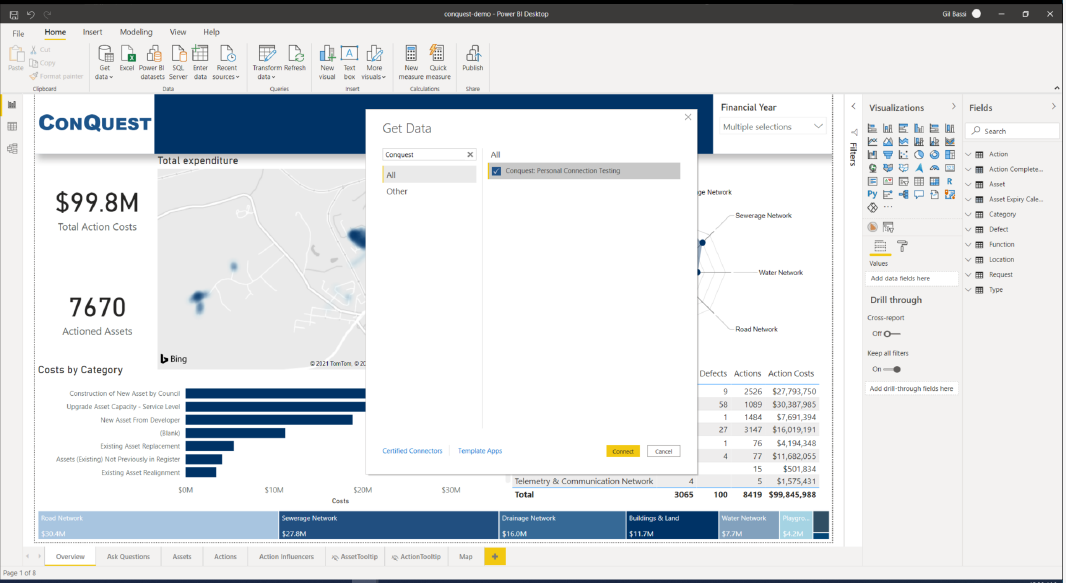
Step 3. Select the Conquest
connector.
Hint: the connector is listed under the “Other” group
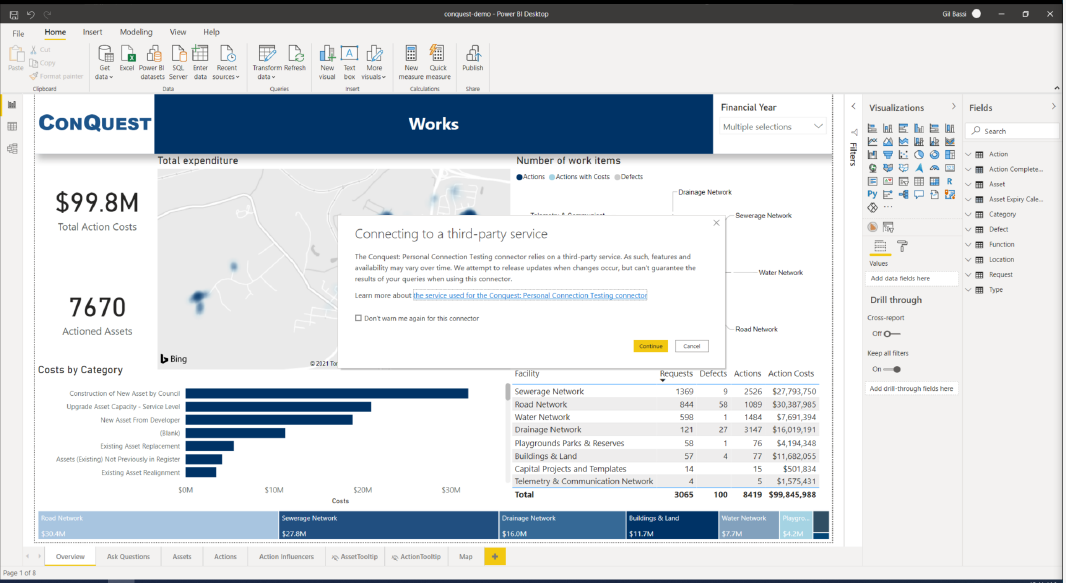
Step 4. Accept the
Microsoft warning about using 3rd party connectors
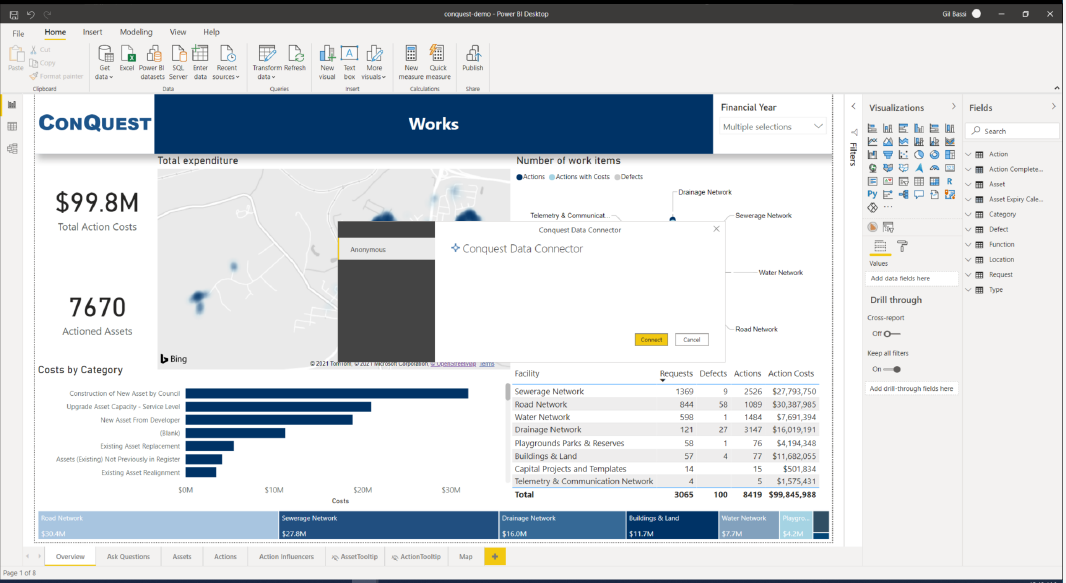
Step 5. Click on
Connect
Step 6. Select the queries
and views to load on the desired model
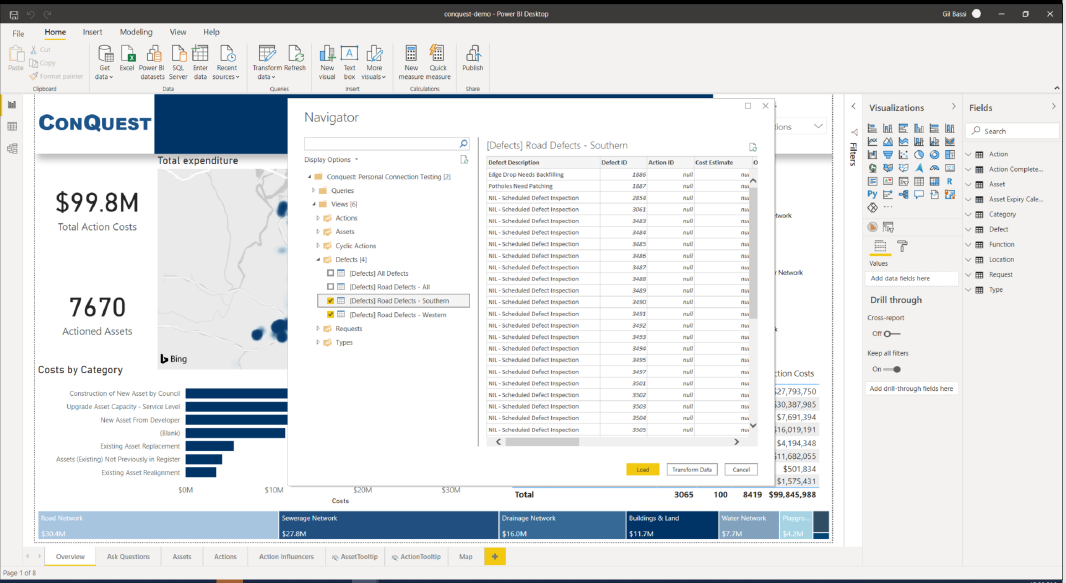
Step 7. Click
Load
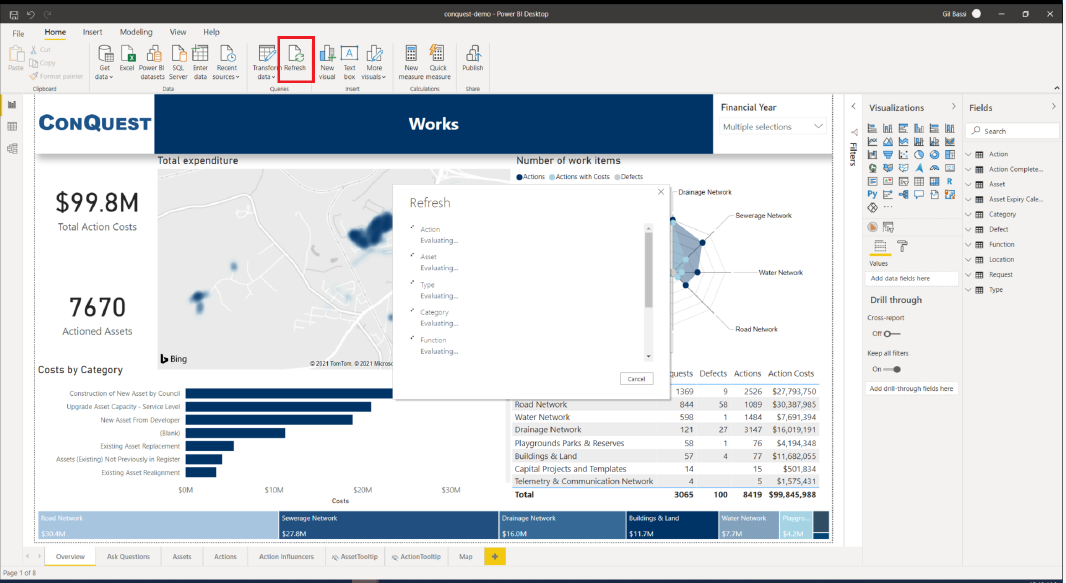
Step 8. Refresh your
Conquest data any time
By following these steps, your Power BI report is already
able to connect to your Conquest data. However, you can perform additional steps
to pre-process your data and take the most out of Power BI
capabilities.
Recommended data transformations
Having your connector in place and Power BI retrieving your
Conquest data successfully is enough for you to start building your report.
However, additional changes on your model can drastically improve your Power BI
report overall.
The following changes are recommended, as they are simple and
effective:
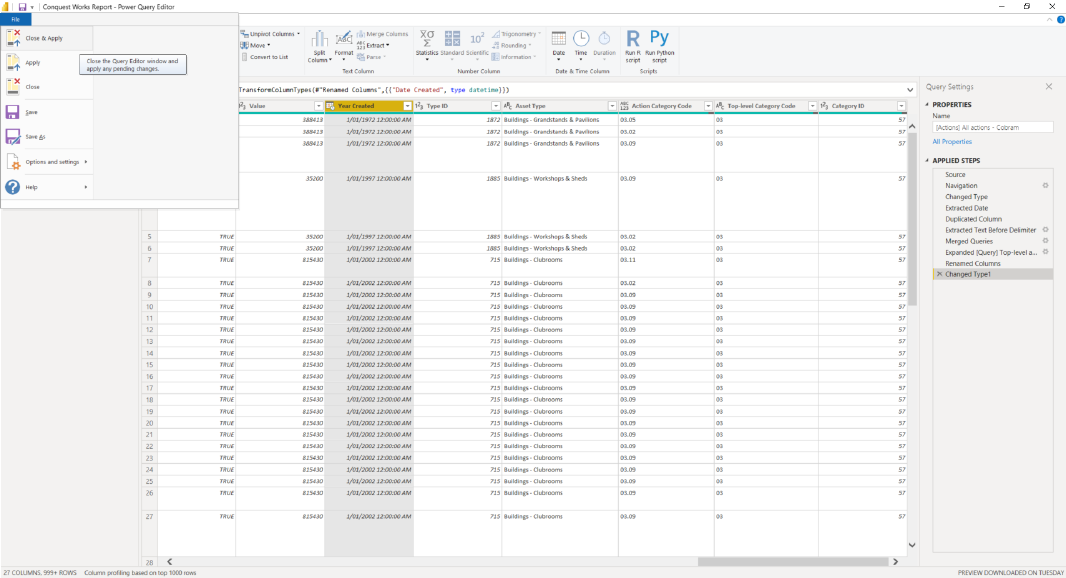
Transform your data
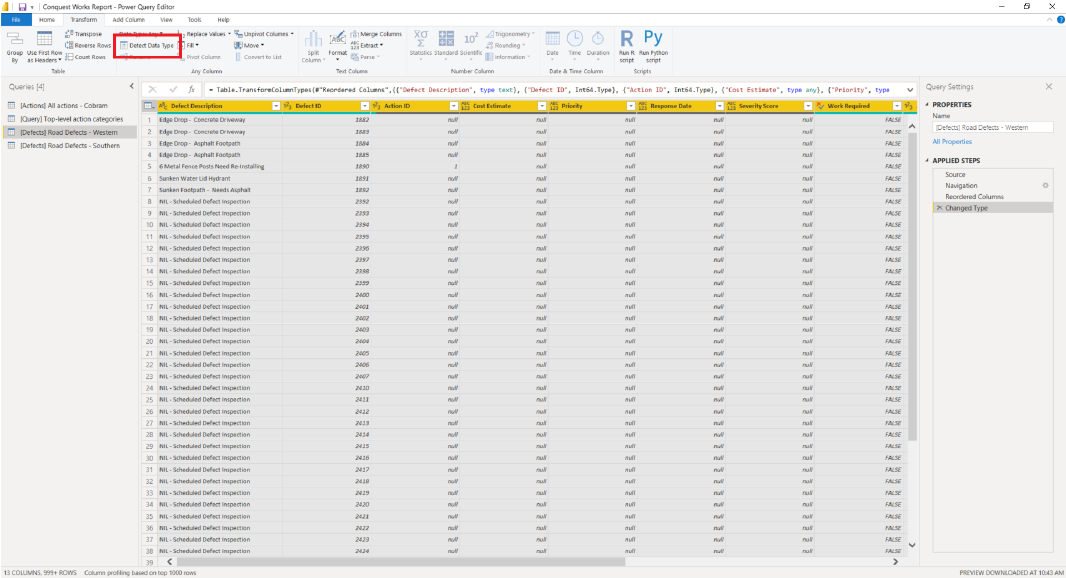
Step 1. Click on
Transform data on the Home menu to open the Power Query editor
Step 2. Cast the right data
types
Note: By default, Power BI leaves all data as a General
type. Casting each field into their respective types improves performance and
facilitates the creation of visualisations
a. Select all columns
on each table
Hint: It can be done by selecting any column and using
the (ctrl + a) shortcut
b. Click on Detect
Data Type on the Transform menu
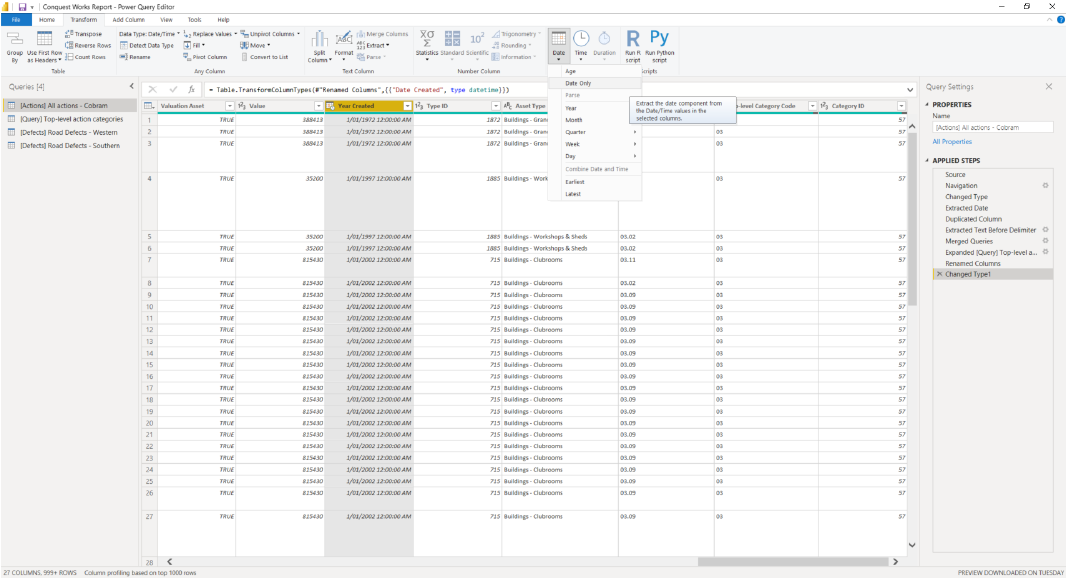
c. Additionally,
select datetime fields and cast them into date only
Note: Although
sometimes the time component may be useful on your reporting, it prevents the
correct relationship with date tables
Step 3. Apply your changes
and close the Power Query editor
Create
relationships between tables
Step 1. Select the modeling
panel
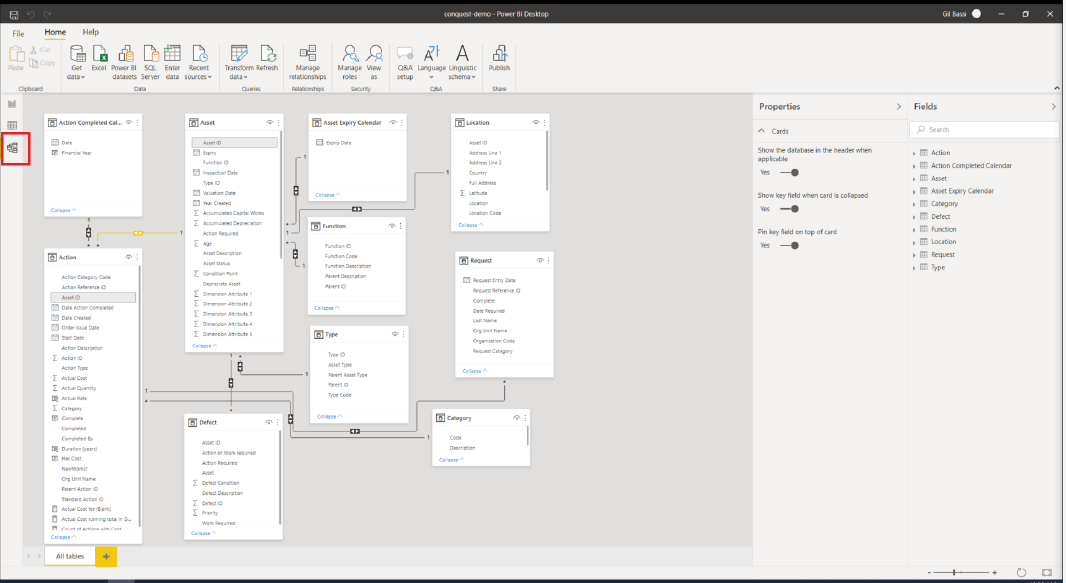
Step 2. Associate fields
from different tables.
Hint: it can be done with a simple drag and
drop or by clicking in Manage relationships.
Step 3. Delete any
erroneous relationship created automatically by Power BI
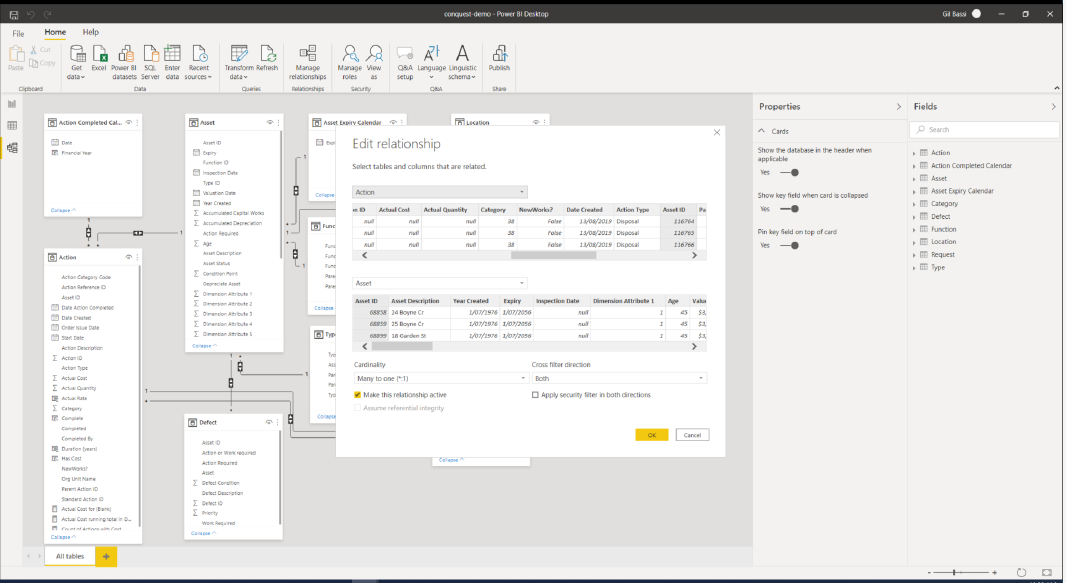
Step 4. Change cross filter
directions
a. Double click a
relationship
b. Set the Cross
filter direction to Both
Note: Bi-directional filters may have a
negative impact on performance, but it improves your data modelling on most
cases.
c. If using security
roles in Power BI, activate the Apply
security filter in both directions.
d. Ensure the
cardinality matches the expected.
Things to be aware of
Any external Power BI connector must be saved under the
Custom Connectors directory. In case your connector does not show up in Power
BI, verify that it is located on the right folder and create it if needed. By
default, the custom connectors directory is “Documents\Power BI Desktop\Custom
Connectors”