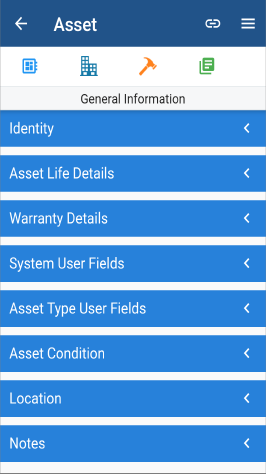
Conquest 4 Forms follow a similar design regardless the Conquest Data Object type:
•A Header consisting of:
![]()
•A Back-Arrow button on the left, to take you to the previous screen, whether that be a Form or the Main Window
•A descriptor for the type of Conquest 4 Mobile Form e.g. Asset, Action, Defect
•A Chain-Link button, to copy the Data Object ID or a web address, to the paste buffer, that can be used for your own purposes or shared with another party
•A Tasks menu (Hamburger Button) for operations that are available for the current Conquest 4 Mobile Form, consisting of:
•A Home icon in the header takes you directly to the Main Window
•Several Conquest Data Object Tasks, which vary with the current open form
•New Document
•When you have made a change to data in a Form, the icon (Hamburger Button) for the Tasks Menu changes to a Save icon (Tick and a number, where the number is of the fields that you have changed). Tapping the Save icon saves your work in the Conquest Database
•Form Button bar:
•Tap the button that you need. From left to right:
•Data specific to the current Conquest Data Object
•Child Assets (only on the Asset Form)
•Actions
•Defects
•Requests
•Documents (see How to View Documents for details)
•Map
•Categories of data identified under collapsible bars (Blue)

•All bars can be collapsed or expanded with a ‘Long-press’ in the middle of any bar, as per the above image
•Collapsible bars can be collapsed and expanded individually with the ‘Arrow-head’ on their right

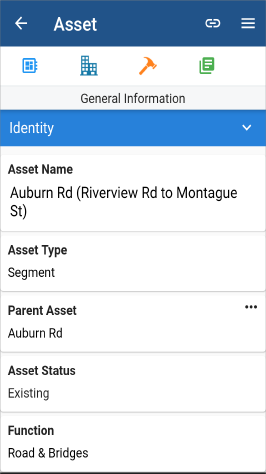
•In the case of Assets and Actions, the first Collapsible bar is always the ‘Identity’ the Conquest Data Object, as per the above image:
•First the name, or description
•Followed by various other identification details
•Fields that have a value selected from a Hierarchy or a Picklist, have an Ellipsis Menu on the right e.g. in the above image the Parent Asset field has an ellipsis. Tap the ellisis then tap the menu item that you want; in this case ‘View’