
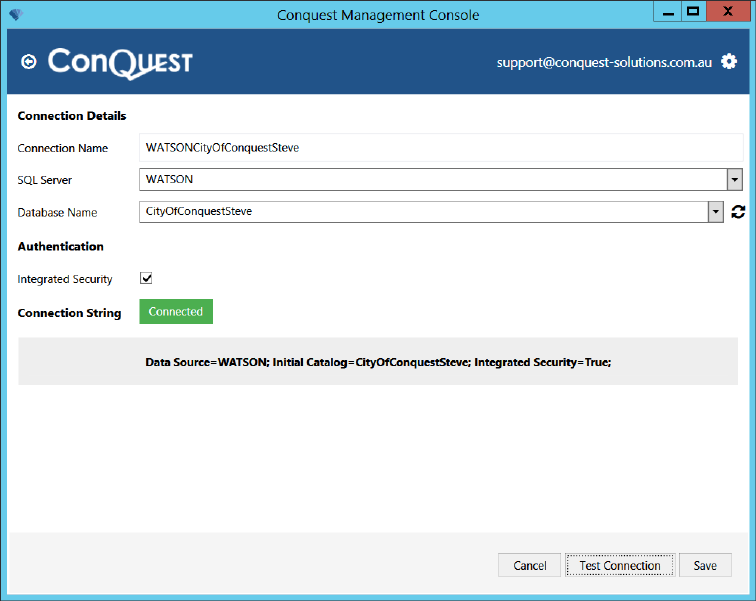
•To make a new Database Connection, click ‘New Database Connection’ and do the following:
•Enter the ‘SQL Server’ name
•For the Management Console to test the connection successfully, you need to select a Conquest Database from the ‘Database Name’ list that you have permission to log in to with Windows Integrated Security
•You can quickly set the ‘Connection Name’ with two copy/pastes; first the ‘SQL Server’ then concatenate it with the ‘Database Name’
•Leave ‘Integrated Security’ ticked
•Click ‘Test Connection’
•If you get “Green - Connected”, click ‘Save’. Otherwise, identify the problem, solve it and test again
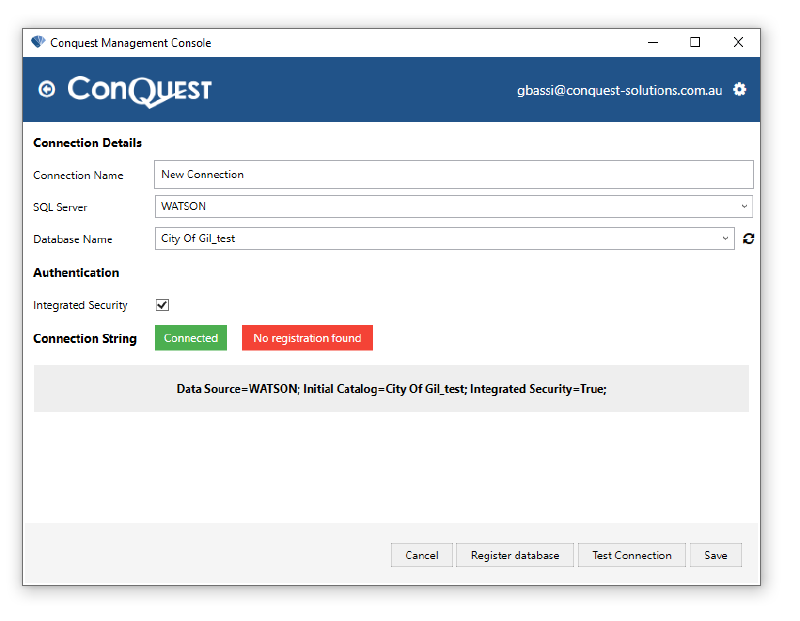
Once the connection has been tested, the Register Database functionality is available, as shown on the following image.
Clicking on Register Database reveals another form, with the options to:
•Set as Production
•Replace an existing registration with the same name
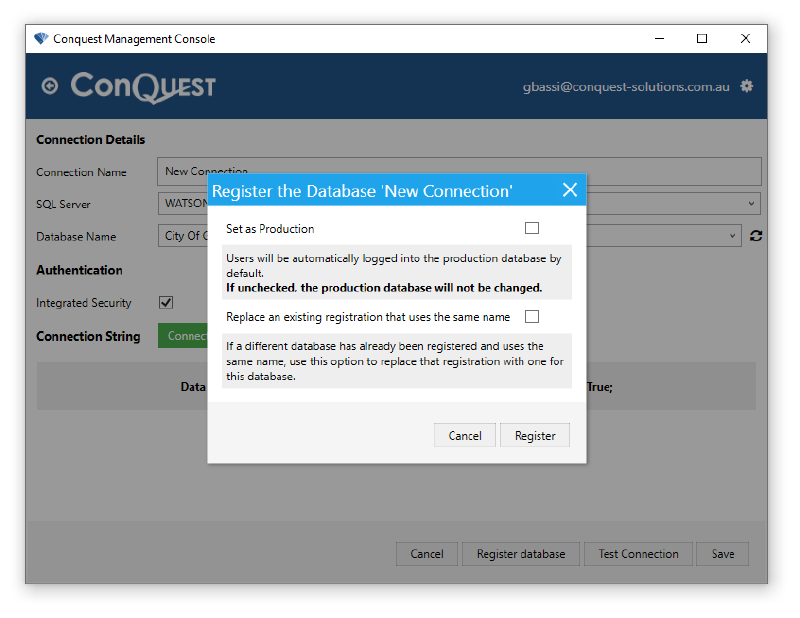
Note: It is important to save the connection after the registrations is complete